Showing posts with label Group of Seven Cardmakers. Show all posts

Thursday, December 28, 2023

Group of Seven December Torn Edge Technique


Be sure and check out the Group of Seven Link above for all the awesome
samples by the Group of Seven Cardmakers.

Videos: 
1)  Torn ripped card stock into beautiful cards by Simon Hurley (14:35)
2)  Torn Stenciling Technique by Gina K (5:11)
3)  Ripped Paper Technique by Natasha Foote (12:24)

I used Simon's Video for my "It's Your Day card" and
Natasha's Video for my "Happy Birthday card."

All 3 video's are great and show you numerous techniques with several examples:-)

****************************

My 1st Card using Simon Hurley's Video using Torn Ripped Masking Tape 
into Card Technique. 
Video Starts at 10:45 for this card technique.
 
I used ripped 3M Wide Masking Tape over the 110# Arches Hot Press Paper.
Then used Simon's technique to blend the DOX inks using TH Blending Sponge.
Used DOX inks: Peeled Paint, Salty Ocean and Chipped Sapphire.
And then removed the torn edges masking tap...Wow!!
 
Next I stamped SU Retired Sale-a-Bration stamp set: "Flowering Fields" for the 1st time
using VersaFine Clair Nocturno Pigment ink.
The sweet tiny butterflies are part of the set.  I used Derwent Watercolour pencils on 
the butterflies and Wink of Stella for a bit of sparkle, which shows up IRL:-) 

Used MISTI to stamp the sentiment with black pigment ink.
The sentiment is a SU retired Hostess set.."Happiest Birthday Wishes".

Popped up the card front with craft foam and added to Neenah cardbase and
Done!  I really liked the Torn Edge Technique and will use again:-)

**********************

My 2nd card using Natasha's Ripped Paper Technique with watercolors and vellum.

The close up!

Here is the close up showing off the Shine from the heat embossed stamped 
sentiment and the pretty shiny Gansai Tambi metallic Gem Colors Pigment Watercolors.

I used #4 watercolor brush and all 6 colors from the set..Red, Pink, Yellow Gold, Green, 
Blue and Violet:-)  When completely dry (I used heat tool) I placed in
MISTI and stamped the Retired Hostess SU "Happiest Birthday Wishes" set using
Clear Versa Mark ink and Heat Embossed with Wow Opaque Bright White Regular
Powder.  Such beautiful shine on the sentiment and watercolored Gem colors:-)

I then added my torn vellum and Arches Hot Press using foam tape to pop them up.
I closely followed Natasha's video and her 1st ripped card technique.

I loved both cards,  but this is my favorite.  
A great way to use different watercolor products, which I have:-)

I hope you join us on our Group of Seven Linky:-)

Merry Christmas and Happy Healthy New Year dear friends.
Love and Hugs..


**********************

Supplies:
Card #1
Stamps: Ret. SU Flowering Fields.  Ret SU Happiest Birthday Wishes.
Paper: Neenah Solar White Crest Smooth 110# and Arches Hot Press. SU Vellum.
Inks: Clear Versamark.  DOX inks: Peeled Paint, Salty Ocean and Chipped Sapphire.
VersaFine Clair Nocturno Pigment ink. Derwent Watercolour pencils.
Accessories: T.H. Blending Sponges.  MISTI. Wow EB Powder. Heat Tool. Wow Opaque Bright White Regular EB Powder., Craft Foam.

Card #2
Stamps: SU Retired Hostess,  "Happiest Birthday Wishes" set again:-)
Paper: Arches Hot Press WC paper.  SU Vellum. Neenah Solar White CS.
Inks:  Gansai Tambi metallic Gem Colors Pigment Watercolors.  Clear Versamark ink.
Accessories:  #4 watercolor brush.  MISTI. Wow Opaque Bright White Regular
Powder. Heat Tool. Foam Tape. 

Tuesday, November 28, 2023

Group of Seven Cardmaker's November Smooshing with Cling Wrap


Click on the link above for the GO7 November Blog Cling Wrap Technique
and the fabulous Cardmakers Cards and Technique descriptions and videos. 

Also we love when you share your cards on our blog Linky:-)

I used Brushos and Magicals Powders to create my Cling Wrap backgrounds.
Enjoy:-)

My Brushos Cling Wrap "Signature" Tree Christmas Card:-)

I lightly spritzed water onto an A2 size piece of Strathmore Mixed Media paper
 and sprinkled with Brushos Blue, Red and Green powders.
Then spritzed again lightly and tipped the MM paper to spread the ink.

Next placed a piece of Cling Wrap a little bit larger than the A2 paper and
tucking extra wrap under the sides.  Then used my fingers to scrunch up the wrap.
Be sure and check out the videos on our GO7 blog home page too.

Set the piece aside to dry overnight.
Removed wrap and let background completely air dry.
I got line marks, but no cells.

Then die cut with Pinkfresh Studio "Braided Oval" Die.
Used my new to me Simon Says Stamp "Place and Score Embellishmdient Wand"
to poke out the paper that were left in Many of the big and tiny die holes.
I have several similar tools,  but I am already liking this the best:-)

Then die cut the larger Braided Oval die for a white frame.
Added the SSS Clean Lines Christmas Dies star that I die cut from 
silver glitter paper from my stash.

Used Misti to stamp the  SSS Clean Line Christmas Stamps sentiments (out of stock)
 with Versafine Clair Nocturne pigment ink and heat emboss with SU Clear EB powder.
 
I arranged the star and sentiment to give a faux Christmas Tree look:-)
Attached layer to white frame with Connect Glue using Fine Tip Bottle.
Then popped up white frame with SU dimensionals to Neenah Bright White
card base and Done!  I was pleased with the result😊

************************

My Lindy's Magical's Powder Cling Wrap Christmas Card.
If only you could see the Magical Shine in the Background.
So much prettier IRL!

My 2nd card using the same Cling Wrap techniques as my 1st card,  but this time
 I used Lindy's Magicals Powders.  I used red, teal and green powders. They are more
 pastel Christmas colors,  which I never use,  but thought heck...why not!

My Magicals Smooshing Cling Wrap Technique background had even lighter markings
 than the Brushos background,  but I think it was because of using Magical's Powders.

I die cut the piece with Spellbinders Rectangle Hemstitch Die and again used
my SSS Place and Score Embellishment Wand to poke out all the holes on the border.

I used the SSS Clean Line Christmas Stamps for the stamped and 
heat embossed trees,  but stamped the trees with SSS white pigment ink
 and heat embossed with Wow white EB powder.

Next stamped and heat embossed the sentiments and attached with Connect Glue.
I added light blue and light green shiny rhinestones from my stash.
Popped up main image with SU dimensionals and Done!

**********************

My 2nd Magical's powder Peace, Love, Joy Cling Wrap Christmas Card.

I used  the same Red and Blue shades of Lindy's Magicals colors as the above card,  
but my camera saw darker shades..lol!

I used the same oval Spellbinder die as the card above to die cut the background.
Then used the same SSS Clean Line Christmas Stamps for the heat
embossed trees.

Added the light blue rhinestones and die cut glittery stars.
 then stamped the STAMPlorations "Homespun Christmas" sentiments
with black pigment ink and heat embossed with clear EB powder and
attached with Connect Glue.

Popped up main image using craft foam and Done!

************************

I am now looking forward to trying the Smooshing Cling Wrap Technique
with Alcohol Ink on Yupo paper:-)
I am determined to get some of the cool cells:-)

Be sure and check out all the GO7 Cardmakers really cool card samples.

Happy Holidays,  dear friends and Thank you for visiting:-)
Love and Hugs..💕
Supplies all listed in descriptions:-)

Again...if you play along we would LOVE to see your cards on our Blog Linky:-)


Sunday, November 12, 2023

More Group of Seven Stenciling over Heat EB:-)


Click on link above to see all the Group of Seven Cardmakers Card Samples:-)

This video by Gina K Stenciling over Heat Embossing is very helpful.
This is a fun and easy technique.

Gina's Steps!
  • Ink up a background stamp with Versamark ink, clear ink or white pigment ink
  • Sprinkle with white embossing powder and heat set
  • Place stencil over top and secure with tape
  • Sponge inks over stencil
  • Use paper towel to wipe off any inks that are sitting on top of your heat embossing (resist).  Remove tape and stencil.
                                                         
2 More Christmas cards...I am Loving this technique:-)

I was inspired by Lolly and Bonnie's Tim Holtz Poinsettia Layering Stencil cards.
Be sure and check them out and thanks girls for reminding me that I got this stencil 
last Christmas season,  but did not use it.....
This was my 1st time to use the Poinsettia Layering Stencil and the 
SSS Clean Line Christmas Stamp Set and matching Dies Set.

I followed Gina K's steps exactly.  
I also have 2 more recent posts using the technique.
My 2nd Post with my 1st Christmas Card using the technique.

I am going to share just my supplies for my new Christmas cards:-)

Supplies:
Stamps: SU Distressed Plaid BG stamp (ret) SSS Clean Line Christmas Sentiments.
Paper: Neenah Solar White and SU Basic Black.
Inks: SSS White Pigment Ink,  DI Barn Door, Mowed Lawn and Scattered Straw. VersaFine Clair Nocturne Pigment Ink.
Accessories:  Tim Holtz Poinsettia Layering Stencil.  The Rabbit Hole Designs Powder Tool for Heat EB. Brutus Monroe Stick and Stamp Mat. 3M Masking Tape. Wow White EB Powder,  SSS Slimline Christmas Dies Set.
SU Dimensionals to pop up sentiment. Altenew Mini Blending Brushes.
 
*************

My 2nd Card plus Close Up of the Gold embossed shine!

Close Up

Supplies:
Stamps:  Same.
Paper: Neenah and Tonic Gold Foil for framing.
Inks:DI Barn Door,  VersaFine Clair Nocturne Pigment Ink.  
Accessories: Same except used Ranger Princess Gold EB Powder.

***************************

Enjoy and thank you for visiting.
Wishing you all a wonderful Holiday Season,  dear friends!

Love and Hugs...


***************************

Sending over to NBUS #56 I used Tim Holtz Poinsettia Layering Stencil and SSS Slimline Christmas Dies Set for the 1st time:-)


Wednesday, November 1, 2023

Group of Seven Cardmakers October Technique Christmas Card


Be sure and click on the link above for all the Groups sample cards
and wonderful detailed descriptions for this awesome easy technique.

There is a Linky too so you can join in our Blog fun!  We are not a Challenge!

You will soon discover that you cannot make just one card using the technique:-)
The technique is Great for Christmas Cards too:-)

This video by Gina K is very helpful too..

My Stenciling over Heat Embossing Christmas Card.

I began by adding The Rabbit Hole Designs white powder to an A2 size
 cut piece of a Neenah white 110# cardstock.

Then used MISTI to stamp my SU En Francais Background (ret) using SSS White 
Premium Pigment Ink.  Removed from MISTI and sprinkled with
Wow White EB Powder and heat set and then set aside card front.
 
Next I attached my Brutus Monroe "Stick & Stamp Mat"
onto my glass mat using 3M double stick tape on the back of it,  
which I can use over and over again.

Next used wide 3M white masking tape to secure the cardstock over S&S Mat.
I always use my masking tape multiple times too.

I sponged Memento London Fog Dye Ink through my stencil using T.H.
Blending Sponge with handle.
Wiped off heat embossed En Francais with paper towel
to make sure no London Fog ink was left on script.

Then placed in MISTI and stamped with VersaFine Clair Nocturne black
pigment ink and heat embossed the Pinkfresh Poinsettia Stamp
sentiment with clear SU EB Powder.

I attached with Connect Glue the card front to Neenah 110# White Cardbase 
and embellished with 2 stacked layers of the Pinkfresh Poinsettia Washi Tape
wreath and center image and Done!
 
I was very pleased with the results:-)
The technique worked great for a Christmas card design.

Hope you join us and add your cards to our Linky:-)

The holiday season preparations have started in earnest...Enjoy💖
Time to bundle up too...we are now into our SW Oregon Rainy Season:-)

Love and Hugs and Thank you for visiting💕

**********************************

Supplies:

Stamps: SU En Francais Background wooden stamp (ret).  Pinkfresh "Poinsettia Stamp Set" sentiment was the 1st time for me to use:-)  

Inks: Memento London Fog Dye Ink. SSS White Premium Pigment Ink. VersaFine Clair Nocturne Pigment Ink.

Paper: Neenah 110# white CS.  Pinkfresh "Poinsettia Washi Tape" My 1st time to use!  The poinsettia Stamp Set, Washi Tape and Dies have been discontinued:-(....I did pick up an extra roll of Washi Tape,  but discovered 1 was plenty...you will be seeing more Christmas cards in the future with the 2 products..and I also shared with friends all from my 1st roll:-)

Accessories: Pinkfresh Poinsettia Dies Set,  which I  used for the 1st time:-) T.H Blending Brush, Brutus Monroe Stick and Stamp Mat...LOVE using with stencils and watercoloring images with paint brushes..no WC on this card. Connect Glue. MISTI.  Heat Tool.  3M Masking Tape.  Rabbit Hole Designs powder.  Wow White EB Powder.  

*******************************

I am sending over to NBUS #56   Used Pinkfresh Poinsettia Stamp Set, Die Set and Washi Tape for the 1st time:-)


Saturday, October 28, 2023

Group of Seven Stenciling over Heat Embossing


Click on link above to see all the Group of Seven Cardmakers Card Samples:-)

This video by Gina K Stenciling over Heat Embossing is very helpful.
This is a fun and easy technique.

Gina's Steps!
  • Ink up a background stamp with Versamark ink, clear ink or white pigment ink
  • Sprinkle with white embossing powder and heat set
  • Place stencil over top and secure with tape
  • Sponge inks over stencil
  • Use paper towel to wipe off any inks that are sitting on top of your heat embossing (resist).  Remove tape and stencil.

I am sharing 3 cards using this wonderful technique.

I used the stencils (gift from a dear friend) in the 1st and 2nd cards for the 1st time.
Sharing them with our dear GO7 Cardmaker Darnell's NBUS Blog:-)

My 1st card!

I followed Gina's steps exactly for all 3 cards.
               Supplies Card #1
               Stamps: SU En Francais  wooden block background (2000) Ret.
               Paper:  SU Cucumber Crush, Neenah White 110# CS. SU Black Basic for 
               sentiment.
               Inks: Versamark Clear.   Distress Oxides: Lucky Clover 
               Accessories: SSS Summer Bouquet Stencil. WOW Opaque Bright White EB
               Powder. Heat Tool.  STAMPlorations Everyday Sentiments Dies. Connect Glue.
               Altenew mini brush blenders.   
               
2nd Card

               Supplies Card #2
                Stamps: SU Distressed Dots Background Wood Stamp.
                Paper: same as Card #1 
                Inks: Versamark Clear.  Distress Oxides: 
                Accessories: Stamperia CM20x25 Stencil.  WOW Opaque Bright White EB 
                powder. Heat Tool. SSS Large Hello Die.  Altenew mini brush blenders.  
                Connect Glue.
           
3rd Card

             Supplies Card #3
             Stamps: SU En Francais wooden block background (2000) Ret.
             Paper: Same as card #1 and #2.
             Inks: Versamark Clear.  Distress Oxides..... 
             Accessories: Magenta Sunflowers Stencil.   WOW Opaque Bright White Powder.
             Heat Tool. SSS Large Hello Die.  Altenew mini brush blenders.  Connect Glue.

***********************

I just could not stop making these fun and easy Stenciling over Heat Embossing
cards...in fact..I actually made a 4th card,  which I will be sharing in our Linky in a 
couple of weeks:-)  It is a very different design.

I was so happy to add cards to my different occasions Stash!!!
We would love to have you join our October Group of Seven Cardmakers Blog
by adding your cards via our Linky!!! 

We are a Blog of friends who Love trying new or old Techniques:-)
Thank you for visiting and wishing you all a wonderful Fall season with more
time to play with your paper crafting toys:-)

 Love and Hugs, 
*******************************

I am sharing my 1st Two cards over at NBUS #55    I used the stencils for the 1st time on the 1st two  cards:-)     


Thursday, September 28, 2023

Sept Dry Embossing with Re-inkers Watercoloring

Time for our Group of Seven Cardmakers September Dry Embossing

Click on link above for all the technique details and card samples by the cardmakers:-)


The Video is a must see!!!!

I began by creating 6 backgrounds using Distress Ink Re-inkers, 
I finished 4 backgrounds into cards and I am saving the other backgrounds
 for future cards:-)

I loved all 4 cards,  but I think this is my favorite:-)

I went step by step following exactly the video for each background!!!

Card #1 Supplies
Stamps: None
Paper: Fluid 100 Hot Press Watercolor Paper,  Neenah Solar White Crest Smooth 5" square cardbase.
Inks: Distress Ink Refills: Wilted Violet,  Broken China, Tumbled Glass Scattered Straw. VersaFine Clair Nocturne Pigment Ink.
Accessories:Glass Mat,  # 12 paint brush,  Spellbinders "Beautiful Blooms" 3D EB Folder.  STAMPlorations HUGS Die.  Craft Foam to pop up image. Connect Glue.

TIP:  I used a different Black Pigment Ink,  but did not work well.  I ordered Versafine Clair Nocturne Pigment Ink from Amazon and received it quickly:-)  I used the Nocturne over my 1st try and I got a sharp Black image...  Again...follow the video and you will have awesome results!!!!!

TIP:  I used the tip in the video to use paper towels and rubbing alcohol to clean the black ink off the 3D EB Folder.  It worked great..just be sure to have enough paper towels handy.  You can control the messiness:-)


***************************

My 2nd Card

Card #2 Supplies
Stamps: None
Paper: Neenah 4 1/4 " Square Cardbase.  Fluid 100 Hot Press Watercolor Paper. 
Inks: DI Refills: Abandoned Coral, Scattered Straw and Peeled Paint.  VersaFine Clair Nocturne Pigment Ink.
Accessories: Glass Mat, # 12 paint brush, Spellbinders 3D "Leafy" EB Folder.  CUTplorations Die Cut Hugs.  Craft Foam, Connect Glue.

***************************

My 3rd Card

Card #3 Supplies
Stamps: None
Paper: Strathmore Mixed Media Paper,  Neenah 5" Square Cardbase.
Inks: DI Refills: Broken China and Peeled Paint. VersaFine Clair Nocturne Pigment Ink.
Accessories:  Glass Mat, # 12 paint brush, Spellbinders 3D "Leafy" EB Folder.  CUTplorations Die Cut Art Happens.  Craft Foam, Connect Glue

TIP: I used Mixed Media Paper on this background and did not get as crisp of an image as I got from the 3 Hot Press watercolor paper cards.

*****************************

My 4th Card
58th Anniversary card for Denny:-)


Card #4 Supplies
Stamps: None
Paper: Fluid 100 Hot Press Watercolor Paper.  Neenah A2 Cardbase.
Inks: Distress Ink Refills,  Abandoned Coral, Spiced Marmalade and Scattered Straw. VersaFine Clair Nocturne Pigment Ink.
Accessories: Glass Mat,  # 12 paint brush,  Spellbinders "Beautiful Blooms" 3D EB Folder.  CUTplorations Die Cut Smile. Craft Foam,  Connect Glue and Heat Tool.

***************************

Once I finished the watercolored backgrounds,  
I dried with Heat Tool and used the 3D EB folder Technique
Finishing each card went quickly:-)

I am still Amazed at the WOW factor of each of these beautiful artsy cards!!!
I can't wait to use this awesome technique in the future:-)

Hope you join our Group of Seven Cardmakers Technique Blog.
We Love it when you add your cards to our Linky!!!

Thank you for visiting and hope you get to try this awesome technique too!!

Love and Hugs..


Sunday, August 20, 2023

More Coloured Dry Embossing

July Coloured Dry Embossing Technique by Group of Seven Cardmakers!
Click on the link to get all the details for ways to color your dry embossed
images on your cards and to see all the girls beautiful card samples.


This has been the most wonderful technique..This time I used
Distress Oxide Inks and watercoloring to color my beautiful 
New to me SSS "Darcey Bouquet Set" of one 3D Folder and
3 matching Flower Dies..so beautiful!

I ordered the set...to make a special card for my dear forever
(60 years) special friend,  Daisy.

Sweet Daisy passed away a week after a fall at the age of 94 before
I received the set.  So instead I made a special thank you/
thinking of you card for our dear friend, Martha.

Martha has been like family to Daisy for 55 years and 
a loving caregiver the last few years.
Thank you and Thinking of you dear Martha💕


I misted my new Simon Says Stamp 3D Darcy Bouquet Folder
with water using T.H. Distress Sprayer then placed A2 Neenah
Solar White cardstock in folder and thru Big Shot.

I got a beautiful detailed floral image.  I made several for future
cards.  Then die cut the 3 flowers from just partial 3D images 
of just the flowers using Strathmore Mixed Media Paper 
so I could then watercolor the flowers.

I used i crafter Blender Brushes to blend Distress Oxide Inks:
Squeezed Lemonade, Twisted Citron and Cracked Pistachio inks
onto the 3D background.

Next used the Winsor+Newton Cotman Watercolours and
#1 Princeton watercolor brush to paint the die cut flowers and
 the yellow 3D flower image.  When flowers dried I used a stylus
to shape the die cut flowers and attached using SU Mini
Dimensionals.

Attached Strathmore Black MM layer to Neenah A2 White 
cardbase then attached 3D cardfront, which I trimmed a bit
to get a nice black border to make the images pop.

Added a Penny Black "Smile All Season" stamped sentiment
and Done!  I loved the results.  BTW, yellow and green were
Sweet Miss Daisy's favorite colors:-)

Celebrating Daisy's 85th Birthday with friends!

Daisy is now in heaven with her family, friends and cats
after a wonderful sweet chapel memorial with her
close and forever friends💕

Love and Hugs dear friends..thank you for visiting.


***************
Supplies:
Stamps: PB Smile All Season sentiment.
Papers: Neenah Solar White Crest Smooth.  Strathmore Black Mixed Media.
Inks: Distress Oxides:Squeezed Lemonade, Twisted Citron and Cracked Pistachio inks and Archival Jet Black for sentiment. Winsor+Newton Cotman Watercolours.
Accessories: SSS 3D Darcy Bouquet Folder with Die Cut Flowers, #1 Princeton WC Brush, i-crafter Blender Brushes, Stylus, Connect Glue.

Sending to...
                       Group of Seven Cardmakers Blog Linky


NBUS #53 Never Before Used Schtuff Challenge:-)


Friday, July 21, 2023

Group of Seven Off the Edge...Again!

Another card using the Group of Seven July "Off the Edge" design!
Click Here to see more designs by the Group of Seven Cardmakers.


Off the Edge is such an effective easy design.
I am adding my card to the Linky...you can add your cards too. 
So much fun to share...

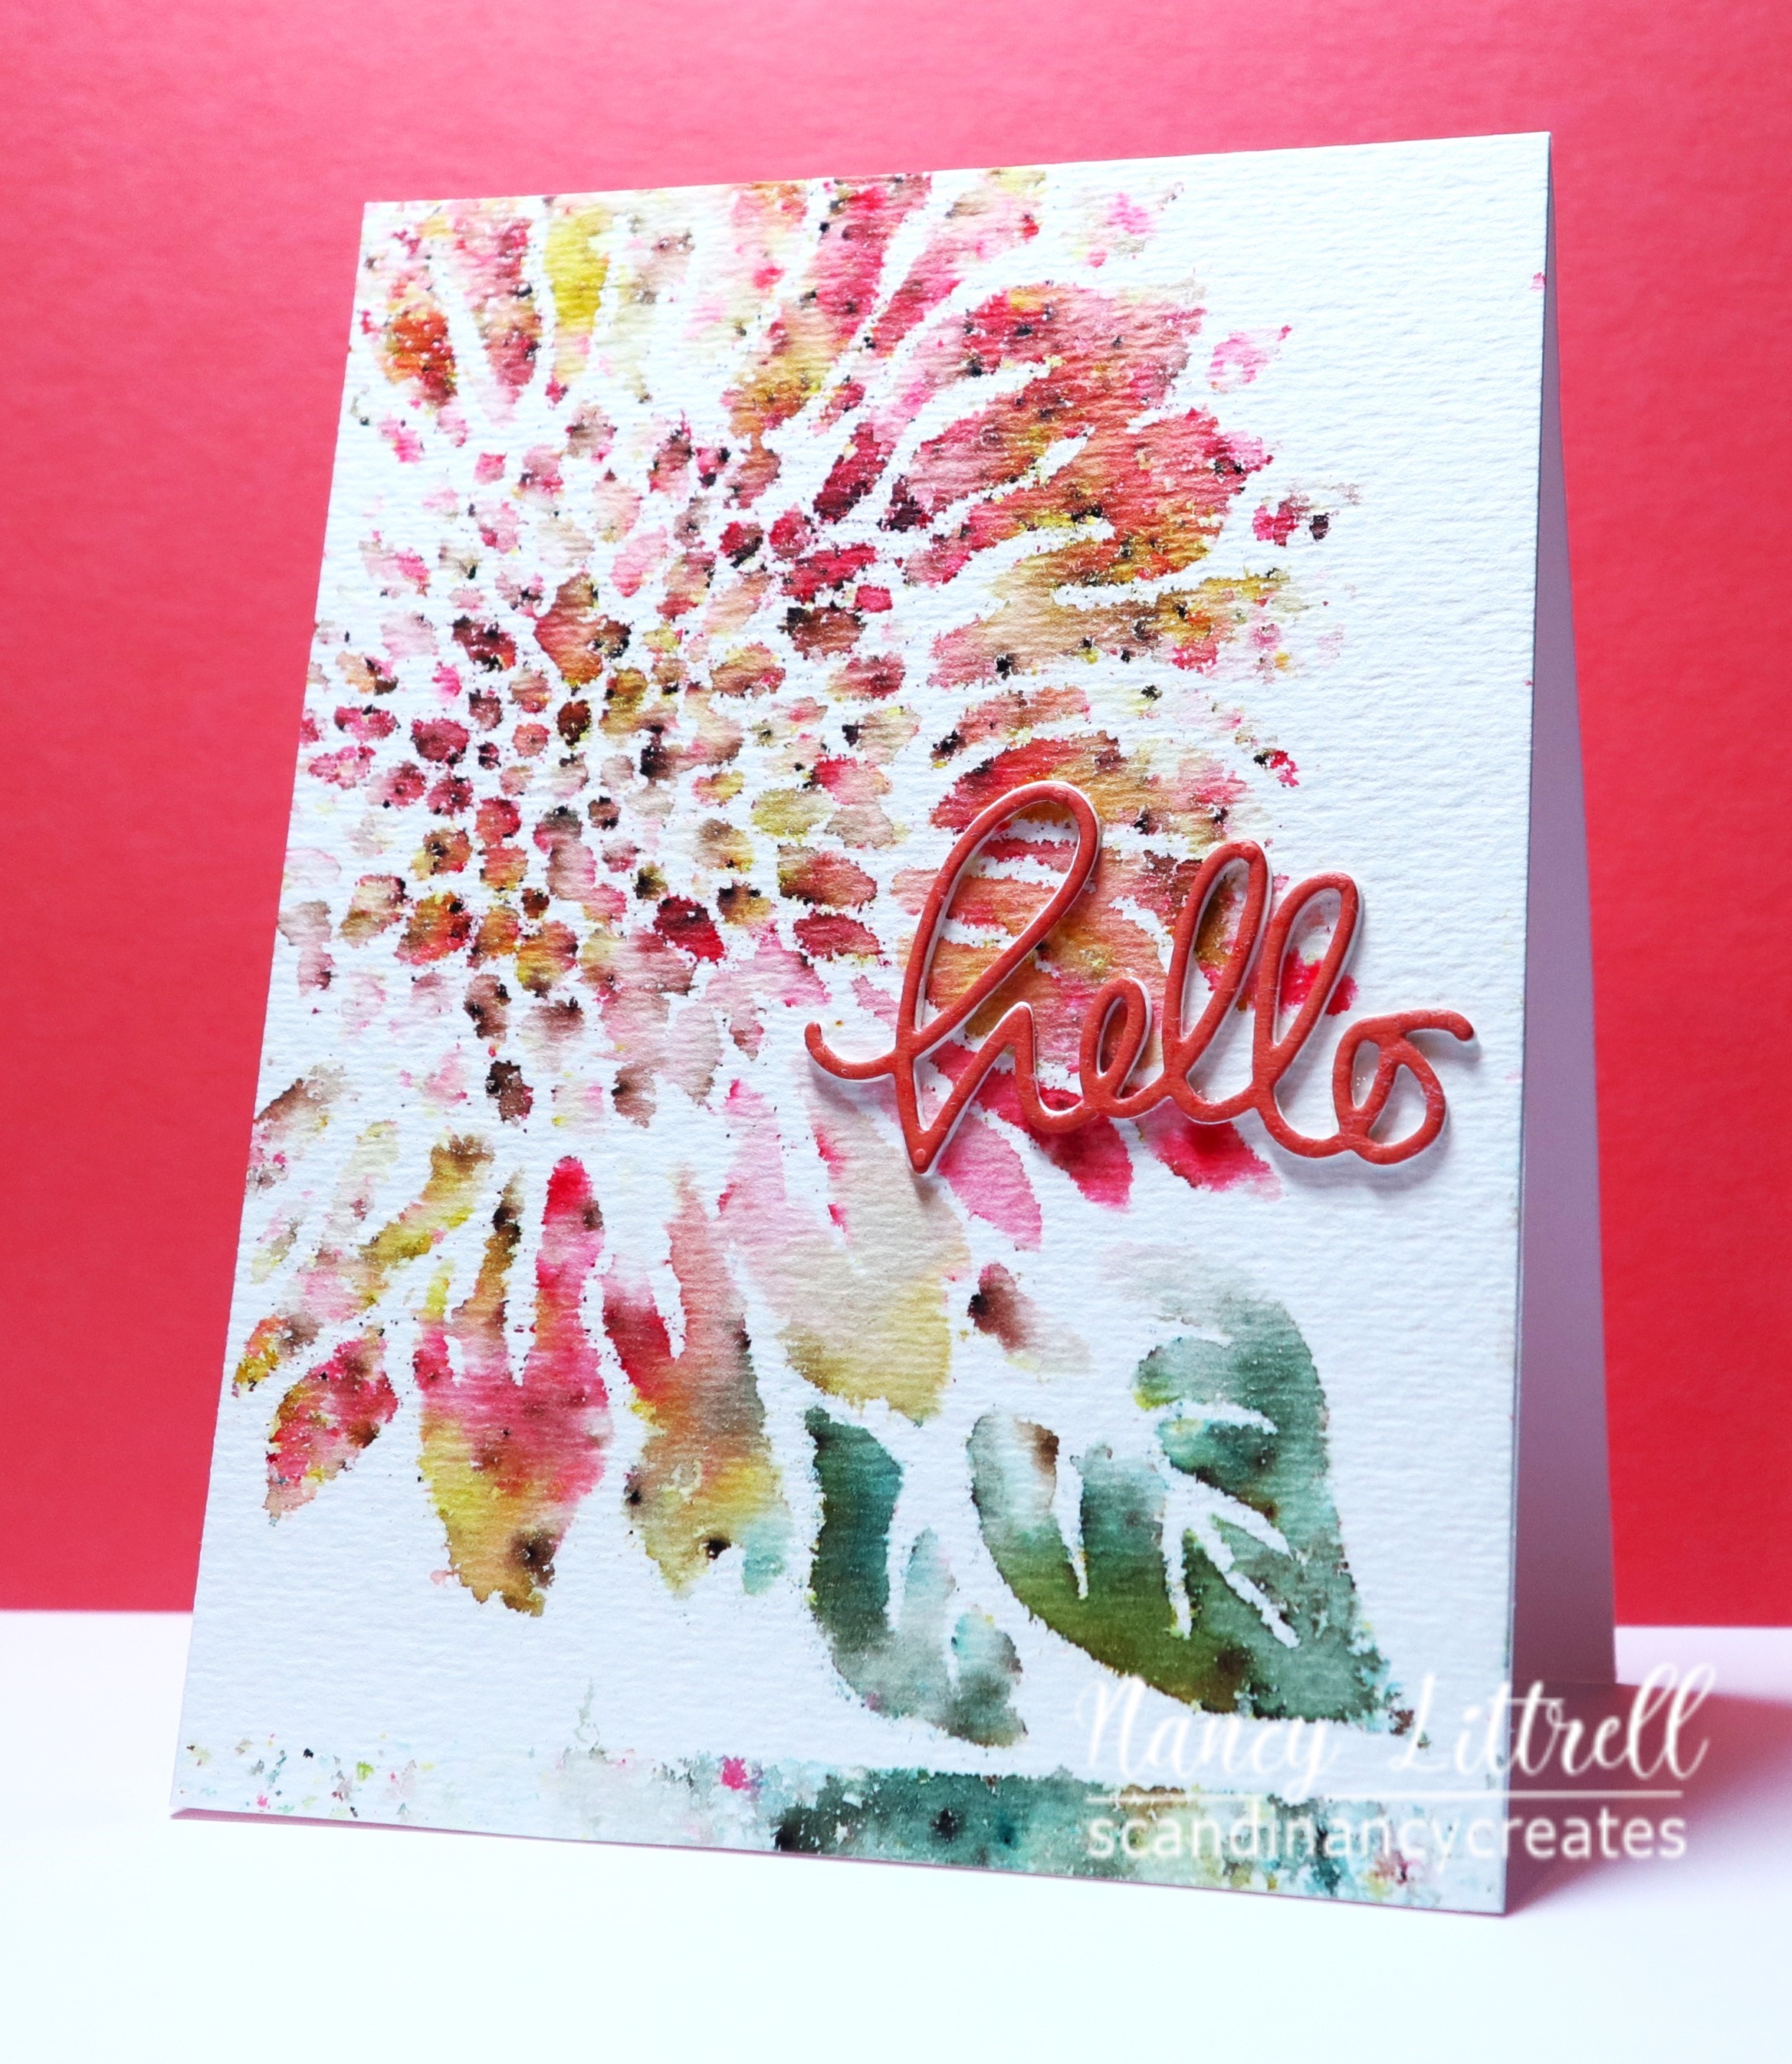
If you search "TCW Sunflower Stencil" on my side bar you will see
many more card examples using this awesome stencil:-)  Enjoy...

I found this awesome card front in my stash
using my Favorite "TCW Sunflower Stencil".
I used Strathmore Cold Press paper and an assortment of Brushos.

This I believe were my Brushos steps...
Secured my A2 card front with masking tape, then secured stencil.  Next 
sprinkled the Brushos thru the stencil carefully...do not use too much.
Spritzed with water using TH Spritzer and again not too much water.

Removed stencil and blotted image with paper towel
then soaked stencil in warm soapy water.

Today all I did was add the die cut SSS "Small Hello"..stacking with 3 layers
so the Hello would pop up more.  Attached with Connect Glue.
Then attached to Neenah 110# Solar White cardbase and Done.

Thank you for your visit.
The linky party ends in five days:-)

The August Group of Seven Cardmakers goes live on July 28th at 10:00 AM.
Hope to see you then...You will LOVE the new technique!

Thank you for visiting..Love and Hugs...stay cool!!


*********************

Supplies:
Stamps: None
Paper: Strathmore Cold Press,  Neenah Solar White 110# cardstock.  
Inks: Brushos Paints...colors?
Accessories: TCW Sunflower Stencil.  SSS "Small Hello" from my stash.  I added two more layers of white die cut Hello's to pop up.  Connect Glue using Fine tip bottle.

******************
Adding to the Tic Tac Toe Challenge #218...Using the bottom across: Any Shape Die, Single Layer 
and Stencil....