Showing posts with label Distress Inks. Show all posts

Sunday, November 12, 2023

More Group of Seven Stenciling over Heat EB:-)


Click on link above to see all the Group of Seven Cardmakers Card Samples:-)

This video by Gina K Stenciling over Heat Embossing is very helpful.
This is a fun and easy technique.

Gina's Steps!
  • Ink up a background stamp with Versamark ink, clear ink or white pigment ink
  • Sprinkle with white embossing powder and heat set
  • Place stencil over top and secure with tape
  • Sponge inks over stencil
  • Use paper towel to wipe off any inks that are sitting on top of your heat embossing (resist).  Remove tape and stencil.
                                                         
2 More Christmas cards...I am Loving this technique:-)

I was inspired by Lolly and Bonnie's Tim Holtz Poinsettia Layering Stencil cards.
Be sure and check them out and thanks girls for reminding me that I got this stencil 
last Christmas season,  but did not use it.....
This was my 1st time to use the Poinsettia Layering Stencil and the 
SSS Clean Line Christmas Stamp Set and matching Dies Set.

I followed Gina K's steps exactly.  
I also have 2 more recent posts using the technique.
My 2nd Post with my 1st Christmas Card using the technique.

I am going to share just my supplies for my new Christmas cards:-)

Supplies:
Stamps: SU Distressed Plaid BG stamp (ret) SSS Clean Line Christmas Sentiments.
Paper: Neenah Solar White and SU Basic Black.
Inks: SSS White Pigment Ink,  DI Barn Door, Mowed Lawn and Scattered Straw. VersaFine Clair Nocturne Pigment Ink.
Accessories:  Tim Holtz Poinsettia Layering Stencil.  The Rabbit Hole Designs Powder Tool for Heat EB. Brutus Monroe Stick and Stamp Mat. 3M Masking Tape. Wow White EB Powder,  SSS Slimline Christmas Dies Set.
SU Dimensionals to pop up sentiment. Altenew Mini Blending Brushes.
 
*************

My 2nd Card plus Close Up of the Gold embossed shine!

Close Up

Supplies:
Stamps:  Same.
Paper: Neenah and Tonic Gold Foil for framing.
Inks:DI Barn Door,  VersaFine Clair Nocturne Pigment Ink.  
Accessories: Same except used Ranger Princess Gold EB Powder.

***************************

Enjoy and thank you for visiting.
Wishing you all a wonderful Holiday Season,  dear friends!

Love and Hugs...


***************************

Sending over to NBUS #56 I used Tim Holtz Poinsettia Layering Stencil and SSS Slimline Christmas Dies Set for the 1st time:-)


Thursday, November 1, 2018

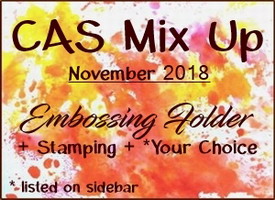
CAS Mix Up November Embossing Folder Challenge

 It is time for our

Be sure and check out the inspiring and filled with textures cards
by our talented DT and Creative Guest Designer Cornelia (Stempel Spass).


My card using Embossing Folder Stamping with Distress Inks, Stamping, and Die Cutting.

I first spent time looking at the videos provided on the CAS Mix Up EB Folder home
page.  Then I decided on the EB Folder Stamping after watch the Video by Audrey at 
Splitcoaststampers.

I used Distress Inks: Peeled Paint, Scattered Straw and Ripe Persimmon and 
used my sponge daubers to daub on the inks randomly on the 
SU Dynamic Textured Layered Leaves folder.
Ink is on the Top Debossed side of folder (side of Sizzix and Stampin Up name)

After sponging ink on folder,  I liberally spritzed with water.
Then placed Strathmore Mixed Media paper in folder.  Closed and ran through
Big Shot.  Carefully removed paper and blotted with paper towel.

Then all the Die Cutting began. I used the same mixed media paper, 
so the whites would match.

Embossed the card front with the same folder.
Die cut the window with Die-namics Rectangle Peek-a-boo Rectangle Window Die.
Placed Distress Ink EB folder behind window so the leaves would line up.
Cut image so smaller and taped to back of window.

Then I decided to add a narrow die cut frame for a white on white effect.
I cut 2 Memory Box Stitched Rectangles and taped together on the back,  
then popped up with dimensional tape.

I added a small stamped PB Happy Sentiment and Done!

I liked the textured soft look of my card. Hope you like it too.
You have until the 24th to play along at CAS Mix Up.  Hugs..


Supplies:
Stamps: Penny Black Happy Snippets.
Paper: Strathmore Mixed Media.  SU Whisper White card base.
Inks: Distress Inks: Peeled Paint, Scattered Straw and Ripe Persimmon. Archival Jet Black
Accessories: SU Dynamic Textured Layered Leaves Embossing folder. Die-namics Rectangle Peek-a-boo Rectangle Window Die. Memory Box Stitched Rectangles. Sponge Daubers. TH Spritzer. Scotch Tape, Foam Tape.


Sunday, March 4, 2018

New CAS Christmas Card Challenge: Holly!

So excited to play in Loll and Bonnie's brand new CAS Christmas Card Challenge:-)

Challenge #1 is Holly!

I was inspired by This beautiful CAS card by Susy aka Boss on Splitcoaststampers,  who was recently chosen Featured Stamper for the week of February 18th:-)

Here is my CAS Holly Christmas Card!


While I had my supplies out I made a 2nd card for my stash:-)


I have a feeling my Christmas card stash is going to grow much quicker than normal with the new CAS Christmas Card Challenge:-)

I started by swiping T.H. Mowed Lawn and Barn Door Distress Inks onto acrylic stamping block and spritzing with water using my T.H. spritzer.  Then stamped onto Fluid 100 Hot Press WC paper.
I used my aqua pen to help move the ink around and add more ink from my block where needed.

When dry I stamped my holly and berries from STAMPlorations "Layered Holly" by Shirley,  with Archival Jet Black ink using my MISTI. Adding Wink of Stella to stamped images.

Then I die cut the frame using SU Square Dies (ret) attaching my main image to my 5" x 5" SU Thick Whisper White card base.  Next adding fun foam to my frame and covering my image.  As you can see,  I used the same framing design as Susy's card above.  Susy also stamped her background with her inked and spritzed acrylic block.

Instead of a silhouette die cut image like Susy used,  I die cut a sentiment
and attached to the upper left corner using Tomboy clear glue.
Thank you Susy for your inspiring card and Congratulations again for being chosen
SCS Featured Stamper.

I was very pleased with both my cards and so happy to add to my Christmas Stash.
Thank you Bonnie and Loll for creating your new awesome challenge:-)
Congratulations dear friends.  Hugs...

Adding to STAMPlorations Never-Ending Anything Goes Challenge.


Supplies:
Stamps: STAMPlorations "Layered Holly" by Shirley
Paper: SU Thick Whisper White.  Fluid 100 Hot Press WC paper.
Inks: T.H. Distress Inks: Mowed Lawn and Barn Door.  Archival Jet Black.
Accessories: SU Square Die Cuts (ret).  Acrylic Block.  T.H.Spritzer.  CUTploration "Be Jolly Word" Die. Tomboy glue.  Fun Foam. Wink of Stella.


Wednesday, January 10, 2018

Twofer #1 Challenge: Feathers by Darnell!

So excited to see the Launch of Darnell's (djkardkreations)


The Prompt for January is "Feathers"


There are wonderful cards from Darnell and her talented DT giving samples of their "Feathers" cards.
Be sure and check out all the rules also on the Challenge Blog!

Here are my two cards using my NBUS (not a requirement) Feathers from STAMPlorations"Trendy Feathers 2" stamp set!

 My Hello Card!

I began by stamping my STAMPlorations Feathers with Versafine Black pigment ink.
Next heat embossed with SU Clear EB powder.

Then sponged my Strathmore Mixed Media paper with Distress Inks: Peacock Feathers, Mowed Lawn and Faded Jeans.  Really saturating the card front with ink.

Placed my NBUS ARTplorations "Flourishes" Stencil over my card front and secured with painters tape.  Then sprayed Tsukineko Frost White ink onto my T.H. blending tool and
dabbed the ink through the stencil.  Removed stencil and let dry, 
which gave the background design a very pretty glimmery white effect.

Close Up

Next I placed my card front in MISTI and stamped and heat embossed the sentiment 
from the Feather stamp set.
 Sponged DI Black Soot around the edges and added rhinestones.
Then added fun foam and attached to SU Thick Whisper White CS and Done!

Now to think about my 2nd card using the same Feathers:-)

Challenges: 


Voila' My CAS Feathers Card!

This card design went together in just minutes with the help of MISTI!

My card looks like a One Layer design,  but actually I designed the Strathmore Mixed Media card front and then attached to the SU Thick Whisper White card base.

I stamped 2 feathers using Archival Jet Black ink in MISTI then cleaned, moved and stamped my 2nd set of feathers.

Next I used my Zigs to loosely watercolor all the feathers leaving quite a bit of white uncolored.

I looked at different sentiment sets for a sentiment that would
fit nicely in the middle.  I used a NBUS sentiment from PB "heartfelt thanks" that fit perfectly.
Added a rhinestone to each feather and done!

I have always liked this quote and it seemed appropriate for our dear friend, 
Darnell's aka Dolly's New Twofer Card Challenge:-) Thanks again for the Challenge, Dolly!

You have until the 24th to play along in the challenge! Hugs

Challenges:


Inksirational #151: Stamping Only


Supplies: 
Card #1:
Stamps: STAMPlorations Trendy Feathers 2 (feathers and sentiment)
Paper: SU Thick Whisper White.  Strathmore Mixed Media WC paper.
Inks: Archival Jet Black. Versafine Black pigment ink. T.H. Distress Inks: peacock feathers, mowed lawn, faded jeans and black soot. Tsukineko Frost White.
Accessories: MISTI. SU Black EB powder, Heat Tool and spritzer.  ARTplorations "Flourish" Stencil. TM Blending Tool. painters tape. fun foam. rhinestones from my stash.

Card #2:
Stamps: STAMPlorations Trendy Feathers 2.  Penny Black Heartfelt Thanks..sentiment.
Paper: SU Thick WW. Strathmore Mixed Media
Inks: Zig markers and Archival Jet Black.
Accessories: MISTI. Rhinestones from stash.

Thursday, March 30, 2017

STAMPlorations March Mixed Media

I am joining the fun at STAMPlorations March Mixed Media Challenge using at least one stencil and mixed media.


I do love playing with stencils and tags.  I used the Layering Stencils Technique on my tag.....


I started with a #8 Ranger Tag.  Stenciled Tim Holtz Cargo letters by sponging White acrylic paint with a blending tool.  This acts as a resist so no matter how many layers of stenciling and stamping the letters will show thru if you rub off some of the inks.

Next I sponged Tim Holtz Distress Inks: Scattered Straw, Worn Lipstick, Festive Berries, Ripe Persimmon and Peacock Feathers with my blending tool.  Then the fun began with sponging more DI's thru stencils.  I used T.H. Dot Fade, Stripes, and Splatters.

Next I stamped STAMPlorations' Shery Russ's "Scribbly Splattery Grunge" and "ART Is" sentiment stamp sets and an old SU lettering stamp using Archival black ink.

I stamped with Archival Black ink Dina Wakely's "Scribbly Bird" onto my tag and stamped again on Arches Cold Press 140# paper.  I colored my bird using DI's and a paint brush,  fussy cut and layered over the stamped image on the tag.

My last steps..adding a little SU ret. Washi Tape to ground my bird,  sponging DI's: Vintage Photo and Walnut Stain along the edge of the tag to bring all the layers together and dyeing SU Daffodil Delight Seam Binding with Distress Inks.

Such a fun Layering Stencils Mixed Media Tag.  Here is the YouTube video Layering Stencils Part 1 by Tim Holtz that really helped me with all my steps.  Enjoy and Happy tag making :-)

My tag is also for SSS Monday Challenge: Things with Wings


And STAMPlorations Never Ending Anything Goes Challenge.


Supplies: Listed in Description.


Wednesday, February 15, 2017

CAS Mix UP February Corrugated Reminder

Who would have thought Corrugated techniques could be so creative and versatile!!!  So many awesome samples for the CAS Mix Up Corrugated Reminder Challenge from the DT, GD and our growing Gallery!


Here is my Card using Stamping + Corrugated Cardboard Sleeve + stenciling with eb paste and Tracing Stenciling.


I placed my TCW Cafe Latte Stencil over my Distress Ink Smooshed background and drew the black lines with my Staedler permanent ink marker and then fussy cut.  I made my smooshed background with Tim Holtz Distress Inks: Brushed Corduroy, Scattered Straw and Tumbled Glass by adding inks onto my craft mat and spritzing with water and then smooshing my watercolor paper onto the inks.  I used Loll's Smooshing with Inks Technique.

I set aside my cup and took a piece of heavy kraft paper and put it through my crimper. I then cut my piece to size for the cup and used my Tim Holtz Distress Crayons: Antique Linen and Vintage Photo to color the corrugation and blended the colors with my finger and spritzed lightly with water.  That really brought out the ridges.  I wrapped the corrugated sleeve around the cup and attached with scotch tape.  That was a fun project creating my main image.

Next I used a new TCW Mini Raven Mosaic Stencil to add Golden's Embossing Paste for texture to the background of the SU Confetti Cream CS (ret).  Stamped my sentiment using PB "Heartfelt Thanks" stamp set with T.H. Vintage Photo using my MISTI.

Next I added a thin frame using SU Early Espresso CS and attached my card front to my Confetti Cream card base using foam tape.  That was it!

I have really enjoyed playing with corrugated cardboard and cardstock this month.  Thanks again Susan DT (Cardmaker's Garret) for hosting your fun CAS Mix Up Corrugated February Challenge.

You still have until February 24th to play along.  Happy Corrugating my friends.  Hugs...


Sunday, February 12, 2017

My 3rd STAMPlorations Tagplorations Tag!

I have had so much fun playing with my new CUTplorations Luggage Tag Dies.   Shery's Tagplorations Linky Party was the perfect opportunity to play with my new Dies!  There are new tag samples each of the 7 days by Shery's very talented DT and lots of prizes available :-)  The party ends on February 14th.  Hope you get to play too.


Here is my tag for Day 5


I went crazy with stencils on my tag.  I used 3 ARTploration stencils, 1 Tim Holtz and 1 TCW stencil.

I  die cut my largest Luggage Tag from a manila T. H. tag and started by covering with a layer of Gesso, let dry and sponged Distress Inks to cover white Gesso.  Then the fun began with the stencils.

I started with the TCW stencil, then the T.H. stencil, then my 3 Artplorations stencils. Sponging with sponge daubers and Distress Inks.

Next, using my palette knife,  I went over my stenciled hearts and bird with Golden's Molding Paste. The paste absorbed the DI inks from the images as it dried.  To make the images pop more I traced with a permanent black pen.

I traced around the edge of the  tag with a shimmer gold ink pen and my black marker to frame the tag.  Added my ribbon, rhinestones, CUTplorations Smile and done.  There was a lot of drying time, but a really fun project.

Adding to more Challenges.

STAMPlorations February Mixed Media..must include a stencil or stencils


STAMPlorations Never Ending Anything Goes


Happy STAMPlorations Tag making......Hugs!


Supplies: 
Stamps: None.  Paper: Tim Holtz Manila #8 Tag.  Inks: T. H. Distress Inks: Scattered Straw, Spiced Marmalade, Ripe Persimmon, Festive Berries, Barn Door, Peacock Feathers, Seedless Preserves. Accessories: CUTplorations Luggage Tag Die and Smile Word.  Stencils: TCW: Raven Mosaic. Tim Holtz: Dot Fade. ARTplorations: Hearts All Over, Flutter By and Christmas Trees for circles.  
Staedler pemanent black pen and SU gold shimmer pen (ret) and SU rhinestones, taffeta ribbon and sponge daubers.  Golden's Molding Paste and White Gesso.

Sunday, January 15, 2017

CAS Mix Up January 2017 Reminder

Here is my Clean and Simple CAS Mix Up January Reminder Card


I used Stamping + Distress Ink Refills Liquid Colours + Die Cuts


Such an easy card to make.  I let the beautiful Simon Says Stamp Die Cut "Birch Column" be the star of this CAS Birthday Card.  I used a wet on wet watercolour technique on a piece of Strathmore Mixed Media paper.  Adding water with a paint brush onto my paper then drops of Tim Holtz Distress Ink refills: Broken China and Peeled Paint,  which I helped move around with another wet paint brush.

My next step was to die cut the beautiful "Birch Column" on a piece of 4" x 5 1/2" SU Shimmery White CS.  Then stamped and fussy cut my new Penny Black "Heartfelt Thanks" sentiment using Archival Jet Black Ink.  Adding a SU Basic Black CS frame and rhinestone.

I got into my stash of Memory Box die cut "Resting Birds" and chose 3 red birds for embellishment.

I attached the watercoloured background behind the "Birch Column" using SU Fine Tip Glue Pen and added the birds with the same glue.  Attached the card front to the black cardstock to make the images pop.  Adding foam tape to the card front and then to the card base gave my card more dimension.  The sentiment tag is also popped up.

I added Wink of Stella to the birds and "Fabulous" to tie into the pretty Shimmery CS.  I wish you could see in the photo, but we all know how they do not show up.....

Enjoy and be sure and check out all the beautifully creative CAS Mix Up January Reminder cards by the fabulous Design Team and Guest Designer, Trina.  You still have until January 24th to play along with us.  We love seeing your creative and inspiring cards in our challenge gallery. Hugs..


Thursday, September 8, 2016

One Layer Stamping and Painting

I recently was going through Pinterest Boards to add to my watercoloring techniques.  I found the most awesome "One Layer Stamping and Painting Video" by Jill Foster for Penny Black. from 2015.

Here is my attempt at trying Jill's Technique...

I followed Jill's instructions as closely as possible.  I used a ruler to draw my 1 1/2" x 3" rectangle on my Strathmore Mixed Media 140# paper.  I then stamped my SU Sheltering Tree and heat embossed with SU Early Espresso EB powder.  I then traced the rectangle with my Early Espresso marker and pulled the ink out into the pre-wetted CS using a paint brush creating a loose watercolor effect.  I added  Brushed Corduroy and Walnut Stain DI's..again using the Wet on Wet technique until I liked the effect.

I let the watercoloring dry before adding Distress Inks: Fired Brick, Dusty Concord, Broken China and Peacock Feathers to the rectangle using again the Wet on Wet Technique.  Let Dry.

Then masked my rectangle and stamped my snowflakes around the edges with Early Espresso ink.  I was pretty happy how my piece turned out after completely dry.  I did add Early Espresso splatters to the rectangle before I framed the card front with Early Espresso CS and popped up on SU Whisper White Thick CS.

I hope you get to try Jill's One Layer Stamping and Painting technique.  It really gives the allusion of 2 layers.  I loved the effect,  since I am One Layer Challenged :-)

My card is for a couple of favorite challenges...."Time Out Challenges": Challenge #65 Inspired by Words...“Love the trees until their leaves fall off, then encourage them to try again next year.” 


Also Simon Says Stamp Blog Wednesday Challenge: Stamp It!


Thank you for the visit and especially for your comments.  Hugs....


Card Recipe
Stamps: SU Sheltering Tree, Teeny Tiny Wishes and Serene Snowflakes (ret)
Inks: SU Early Espresso ink pad and marker, Versamark and Tim Holtz Distress Inks listed in description
Papers: SU Whisper White Thick, Early Espresso.  Strathmore Mixed Media 140#
Accessories: SU Early Espresso EB powder and heat tool.  Watercolor brushes..#6 and #8, foam tape