Showing posts with label CAS Christmas Card Challenge. Show all posts

Friday, September 23, 2022

CAS Christmas Card September Sparkle and or Shine

hosted by my dear friend,  the very CAS creative Hideko!
We all Love Sparkle and Shine for the Holiday Season!


I had so much fun with Sparkle and Shine Christmas card 
that I made Four cards for my stash:-)

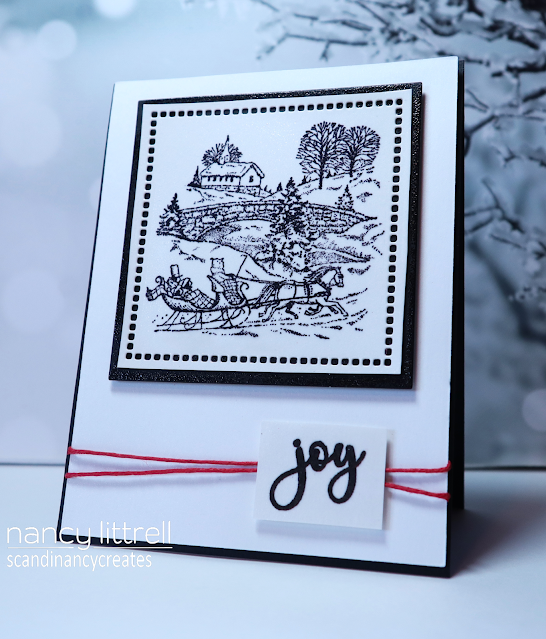
Here is the close up showing the sparkle and shine but way more sparkly IRL!


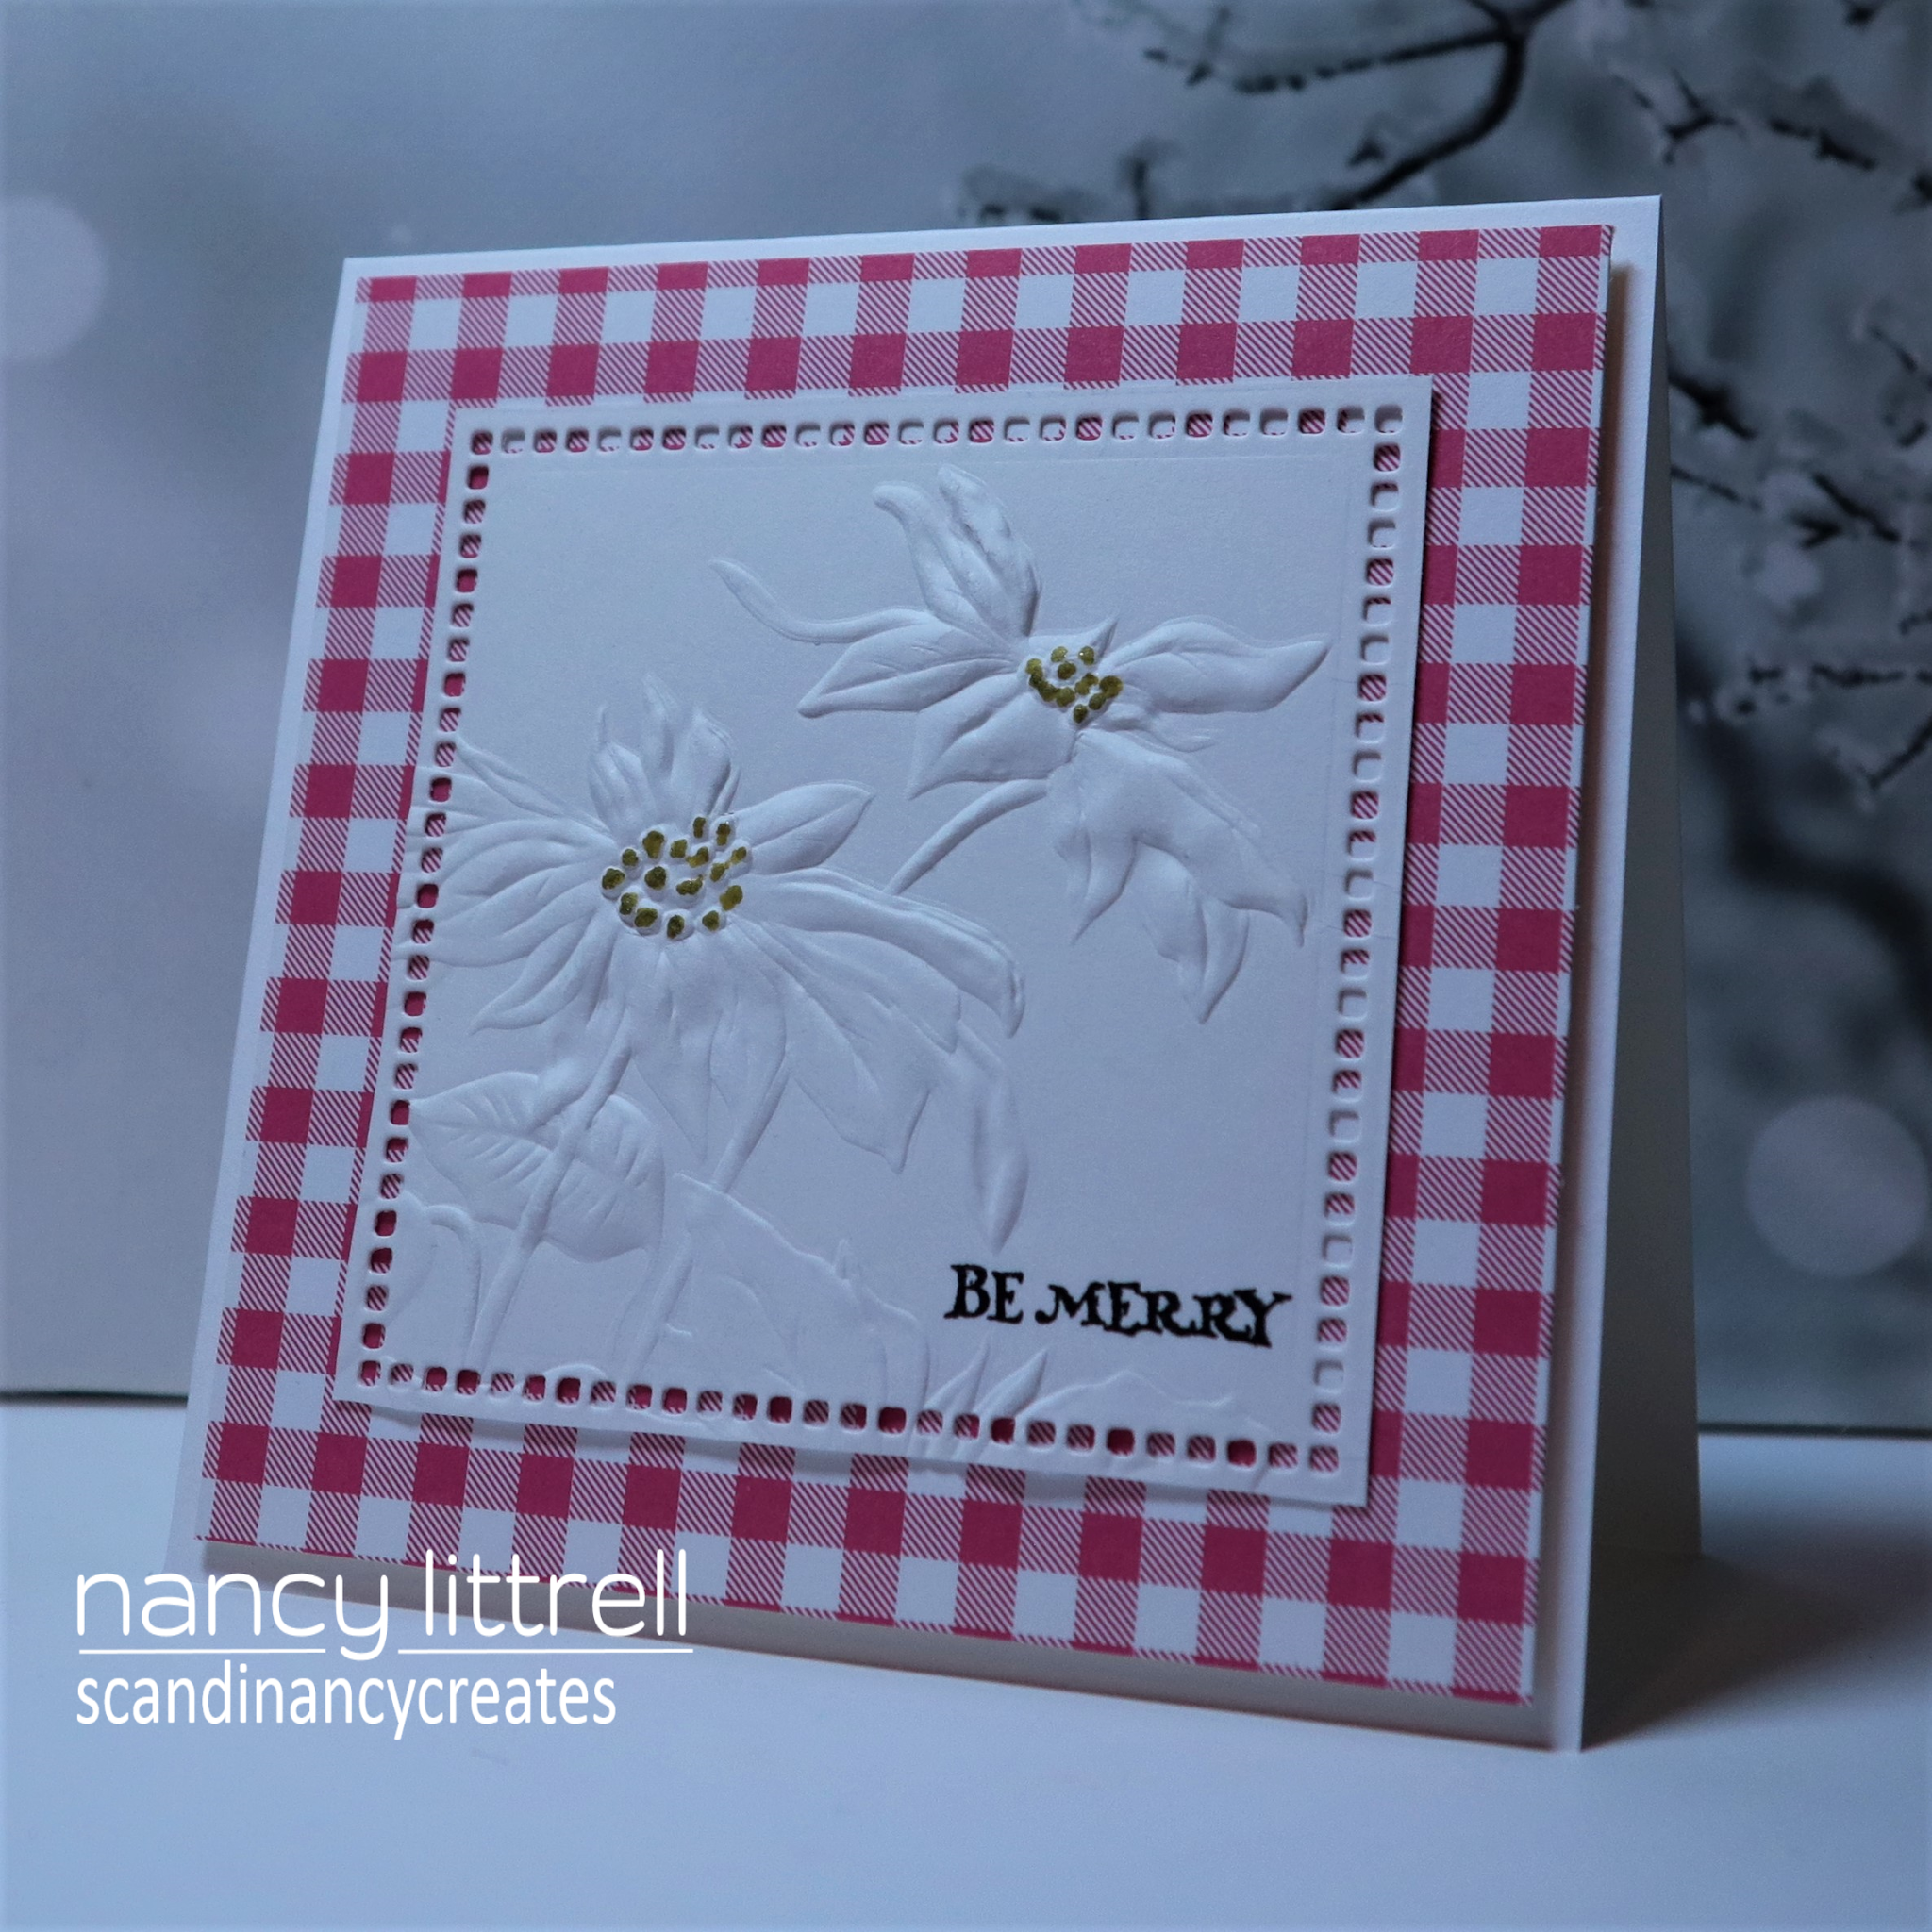
I began by using SU Basic White 110# cardstock for the Altenew "Organic Linen" 3D EB Folder background, which was my 1st time to use the 3D Folder.   Also the 1st time I used the Altenew Dazzling Diamond Glitter Cardstock 120# to die cut the 
Ranger T.H. "Woodland Dies Trees".

After die cutting the tree with the glitter cardstock I punched out the center pieces
 with a toothpick.
Next used the same die to die cut a SU Cucumber Crush cardstock tree and
punched out the center pieces to inlay into the Glittery tree.

Next I die cut another tree with Strathmore Mixed Media 140# paper
 keeping all the pieces in place.
 Then used Connect Glue to attach the MM tree to the back of the Glittery Tree.
I repeated and added another MM tree with Connect Glue for a
nice thick 3 layer Glittery Tree!

There was a lot of Inlayed pieces going on,  but worth the effort.
 I cut a narrow strip of the Altenew Dazzling Diamond Glitter paper and die cut 
the Joyful from SU Red Glitter Paper using the CUTplorations
"Christmas Sentiments Dies" set and cut off the "ful" to make the JOY fit.
I die cut 3 more Joyfuls, trimmed and attached with glue.

Glued the Glitter Trim, Glittery Tree and JOY to the background and
attached all to SU Basic White Cardstock and Done!

Not exactly...I Loved the card and all the Glitter so made 3 more cards:-)
Whew...that was a lot of die cutting, gluing and inlaying, etc...But a beautiful 
glittery way to add to my 2022 Christmas Stash:-)

Thank you Hideko for a really fun and inspiring Challenge, my friend!
 Love and Hugs,

Supplies:
Stamps; None
Paper:  SU Basic White 110#.  Altenew "Dazzling Diamond Glitter Cardstock" 120#. SU Cucumber Crush and Red Glitter Paper.
Inks: None...amazing!
Accessories: Ranger T.H. "Woodland Dies Trees".  Altenew "Organic Linen" 3D Embossing Folder.
CUTplorations "Christmas Sentiments Dies" Joyful. Connect glue. Toothpick.


I am sending my card over to 

NBUS Challenge #42 NBUS Altenew "Organic Linen" 3D Folder and Dazzling Diamond Glitter Cardstock.


Wednesday, August 10, 2022

CAS Christmas Card Pine Challenge

I am playing in the CAS Christmas Card Challenge: Pine hosted by the 
very talented Trina.  Be sure and check out the Design Team's beautiful
and creative Pine CAS Christmas Cards.


This is such a fun and creative way to add Christmas Cards to your Stash!

Here is my Pinecone Christmas Card.

I used my MISTI to stamp the SSS "Pinecone Background" stamp using Versamagic White
Pigment ink and heat embossed with SU Clear EB Powder on
Fluid 100 Hot Press 140# 100% Cotton Watercolor Paper. 

Next I used make up brushes to add Distress Oxide Inks:
Vintage Photo, Gathered Twigs, Walnut Stain, Rustic Wilderness and
Lucky Clover.

Then wiped off inks from the heat embossed images for the Embossed 
Resist technique.  I will be adding this card to our CAS Mix Up 
August Challenge: Emboss Resist!!

The Emboss Resist leaves a beautiful shiny Pinecone image!

Then trimmed the main image and added a thin heat embossed border using
Versamark and Ranger Distress Embossing Glaze Vintage Photo.
Next heat embossed the border for the card front using the same technique 
and attached to SU Basic White 100# Card Base.

Stamped the Penny Black "Holiday Snippets" Believe sentiment onto main image.
Then popped up the main image onto card front with craft foam
and Done!

It was fun adding the heat embossed edges,  which was a new technique for me!
I saw a stamper do this,  but I do not remember who...darn.

Enjoy and hope you get to join in the Christmas Challenge too.  
Love and Hugs..


Supplies:
Stamps: SSS Pinecone Background.  Penny Black Holiday Snippets.
Paper: SU Basic White.  Fluid 100 Hot Press 140#  (I did not need WC paper, but wanted the extra weight.
Inks: Versamagic White pigment for stamped pinecones and Versamark clear for sentiment.  Archival Black for sentiment.
Accessories:  MISTI.  Distress EB Glaze Powders: Vintage Photo, Gathered Twigs, Walnut Stain, Rustic Wilderness and Lucky Clover. Heat Tool.  Craft Foam. 


Adding to CAS Mix Up August Emboss Resist Challenge.  
NBUS #41 Challenge
It was my first time to use the SSS Pinecone Background Stamp.


Sunday, July 24, 2022

CAS Christmas Card Challenge July Santa

I am playing in the CAS Christmas Card Challenge July:  Santa Challenge
hosted by Barb who we are so happy is back after several months:-)

The challenge ends tonight so I am just in time to share my Santa cards.
It is a very busy time this time of year with all our gardening, etc.
Enjoy all the fun Santa CAS cards by the DT and in the Gallery.


Rules

My CAS version using a fun watercolored background of Santa
flying thru the sky with his trusty reindeer:-)

I punched 1" circle out of the watercolored and ink splattered sky
 and inlaid a WC paper circle.
Then used Archival Jet Black Ink to stamp over background with 
Visible Image "Christmas Eve" stamp set using MISTI.  
 Popped up main image with craft foam and attached to card front with Connect Glue.

I stamped the "Christmas Eve" sentiment and die cut with Spellbinders Hemstitch
Rectangles.  I used the same die cut set to die cut the "Christmas Eve" image.
Attached to card front with Connect Glue and Done! 
Christmas Cards:-)

********************

Photo of watercolored Christmas Card background before I decided to cut down 
the rest of the backgrounds for a CAS version.
I had fun making 8 watercolored backgrounds that I finished into Christmas cards:-)
Used Marimi's Small Art YouTube Video to make backgrounds.


I used Black Shadow Inks in Reds and Blues using #8 paint brush on wet on wet
technique onto Canson Cold Press 140# and on Fabriano Cold Press 140#
watercolor paper.

Enjoy and have fun adding to your 2022 Christmas Stash.
Love and Hugs..


Supplies:
Stamps: Visible Image "Christmas Eve".
Paper: SU Basic White 100#.  Fabriano 140# Watercolor paper.
Inks: Shadow Black Paints...Shadow Black Blue and Shadow Black Red.
Accessories: #8 watercolor paint brush.  SU 1" circle punch.  MISTI.  Acrylic white paint splatters.  Spellbinder Hemstitch Rectangles Dies. Craft foam.  Connect Glue. 


Sunday, June 5, 2022

CAS Christmas Card Challenge Wreath

I am joining in the June 2022 CAS Christmas Card Challenge: Wreath!


I am so happy to be joining the CAS Christmas Card Challenge again.
After a break the awesome challenge is open again💕

I used ARTplorations Wreath Stencil,
SU Sizzix Brick Wall 3D Stencil and CUTplorations Christmas Sentiments Die.

I am looking forward to all the amazing and inspiring CAS Christmas Cards by the
fabulous DT and their Guest Designer Sue (Sue's Card Craft).

I used the SU Brick Wall 3D Embossing Folder for my background.

Next placed my NBUS Brutus "Stick and Stamp Mat" from SSS onto my glass mat
with the sticky side up.  Placed Strathmore Mixed Media brick wall over the 
awesome Mat.  Placed the ARTplorations "Wreath Stencil" over the brick wall. 
No need to tape down the stencil.  The mat is 6 1/2" x 8 1/2".  I have used the mat several
times already and is a MUST HAVE Tool!  I use it for assembly cards too!

Now the fun...I used a palette knife to spread Dream Weaver paste.  Removed stencil and 
washed with warm soapy water immediately.  Let paste on wreath dry.

Then placed stencil back over the wreath and painted using
#2 paint brush to paint the leaves and berries with Gansai Tambi Gem 
colors: green and red.  Painted until happy with the coverage. Let dry.

Die cut the CUTplorations Joyful from red glitter paper and popped up with 100# 
white cardstock using Connect Glue and attached below the wreath.

Added very old retired SU Riding Hood Red ribbon and attached card front
to SU Basic White card base and Done!
Loved all the shine from the paint and the texture from the paste😊

Thank you CAS Christmas Challenge girls for all your inspiration and getting us
 back on track for adding to our Christmas card stash😊

Love and Hugs,


*********************

Supplies:
Stamps: None
Paper: SU Basic White 100#.  Strathmore Mixed Media.  SU Red Glitter Paper.
Inks: Gansai Tambi Gem watercolor paints red and green.
Accessories: ARTplorations Wreath Stencil and CUTplorations Christmas Sentiments Dies (STAMPlorations store is closed while Shery is receiving treatments).
Brutus Monroe Stick and Stamp Mat from SSS (A Must Have Tool).  Dream Weaver EB Paste.  SU Brick Wall 3D EB Folder. SU retire Riding Hood Red Ribbon. Connect Glue.

***************************

Sending my card to 


Wednesday, February 23, 2022

CAS Christmas Card Challenge: Winter Scene

I am posting my CAS Christmas Card Challenge: Winter Scene card.
Hosted by the very talented, Christine.
I Love this challenge for adding to my CAS Christmas Card Stash:-)


Stamping, Heat Embossing and Die Cutting.

I stamped my SU "Sleigh Bells Ring" image using Archival Jet Black Ink onto
SU Shimmery white cardstock.  This is a stamp set from 2007 and Retired.

I think I gave it a bit more modern CAS design,  which was fun.
After stamping the image I die cut with Spellbinders Square Hemstitch Dies.
Covered with Versamark and heat embossed with SU Clear EB Powder.
It has a beautiful shine.

Then attached to a square die cut SU Basic Black Cardstock.
Popped up with craft foam and attached to Shimmery White cardbase.

Next added Red Hemp and then stamped STAMPlorations Christmas Joy sentiment 
with Archival Jet Black onto scrap of Shimmery White CS, 
 Trimmed and added Versamark and Heat EB with clear EB powder. 
  
Next popped up sentiment with foam.
Then attached card front to SU Basic Black Card Base and Done!

This would be a QCAS card design for making a few multiples for my stash:-)

Thank you Christine for a fun CAS Christmas Card Challenge💕


Supplies:
Stamps: SU Sleigh Bells Ring.  STAMPlorations Christmas Joy.
Paper: SU Shimmery White CS and Basic Black.
Inks: Versamark. Archival Jet Black.
Accessories: Spellbinders Square Stitched Hemstitch Dies.  Red Hemp a gift from my DD plus more colors:-)  Craft foam.  SU Clear EB Powder.

Adding also to Peace on Earth  Christmas #10 Anything Goes Challenge


Monday, January 10, 2022

CAS Christmas Card Challenge January Silver and Gold

The DT and Guest Designer have Gorgeous card designs.


Here is my card inspired by Hideko's CAS beauty using a textured DP
and Marcia's card using die cut Tim Holtz trees:-) 

My Close Up showing the true Silver and Gold colors.

 The shine distorted the colors. Gorgeous Silver and Gold colors IRL!

I used an old retired Stampin' Up Specialty Textured Glossy Paper with a silver leaf 
design and splatters of gold on the glossy white paper.
I die cut the paper with the dies from Sizzix Tim Holtz "Woodlands" (660978) Die set.

I die cut a 2nd time the larger tree on the left with SU Basic White 100# CS and 
attached to first layer with Connect Glue for a thicker image.

Set both trees aside.  Then cut a piece of SU cardstock from
a retired SU Christmas DSP to ground the trees.  It was glossy paper 
with gold and white stripes.

Then glued the trees to the card front with Connect Glue.
Note:  the glue smudges on the gold stripe does not show in the close up photo
 or in real life!

I used a scrap of gold foil cardstock that I had dry embossed 
with SU Subtle EB Folder for the CUTplorations "Christmas Sentiments 
Dies".   I die cut Joyful and cut off the ful and attached "Joy" with glue and Done!

I LOVED how my beautiful shiny CAS Silver and Gold card 
turned out...because of the inspiration by Hideko and Marcia:-)
Thank you girls and thank you,  Julie for hosting this wonderful challenge.!

Happy New Year and Thank you for inspiring us to start our 2022 Christmas Cards.
Love and Hugs,
Nancy

If you would like to subscribe by email,
please fill out the subscription form in the upper right sidebar.
It is also important to add sw1subscribers@gmail.com to your contact list
so Google recognizes the address and delivers the updates.


Supplies:
Stamps: None
Paper: SU Basic White 100#.  Retired SU Specialty Paper and Christmas DSP.  Tonic Gold Foil. 
Inks: None.
Accessories: Sizzix Tim Holtz Woodland Dies. SU Subtle Dry EB Folder. Connect Glue. 


Wednesday, November 24, 2021

CAS Christmas Card Challenge: Critters


Just in time for the CAS Christmas Card November Challenge: Critters hosted by Barb!
Such a fun challenge with the cutest Christmas cards by the DT, GD and in the Gallery.


Here are my sweet Polar Bear and Penguin Critters:-)

I love this sweet image "Starry Night" by Whimsy Stamps.
There was no sentiment in the set.  I will add a Christmas sentiment inside.
I think the balance is perfect as it is....

I die cut the background of the SU Basic White 100# Cardstock using 
SSS Postage Stamp Edge Frames.
Then used MISTI to stamp the critters and stars with Versafine black ink
and heat emboss with SU Clear EB Powder.

Next I stamped the critters image on cardstock and fussy cut for a mask.
Masked the critters and used craft brush to add the DOX Salvaged Patina background.

Added Connect Glue to beary's hat, stars and snow that the critters were sitting on..
Then added SU Dazzling Diamonds Glitter.

I used Zigs to color the sweet polar bear, penguin and stars.
Connect Glue is great for adding little dots on the sky and then sprinkle with
more Dazzling Diamonds.  So Glittery and pretty.

I popped up the image with craft foam and added to SU Basic White CS 
and Done!  I LOVE this challenge and do not think I missed any in 2021:-)

So happy I was able to squeeze in a Critter Christmas Card:-)  
Enjoy your Holiday Season and wishing you all a Healthy and Happy
Christmas with friends and family...Be safe!

Love and Hugs..


Monday, October 11, 2021

CAS Christmas Card October Challenge

hosted by the very talented Marcia!

I have been so inspired by the DT and their Guest Designer, the very
 Fun and Creative Darnell aka Dolly!


I used my new to me Penny Black "Snowy" snowman stamp!

I am thrilled how my adorable Snowy turned out with his paper pieced
hat and scarf using a scrap piece of old SU Red Gingham Designer Paper.
Here are a couple more cards I made with the same scrap paper:-)

I stamped Snowy onto SU Basic White 100# CS using Versafine Black ink and
heat EB with SU Clear EB powder.
Next stamped and heat embossed Snowy onto the Red Gingham DP.
Then fussy cut the Gingham Snowy using my SU papersnips.

Then I die cut the SU Basic Gray CS using Spellbinders Rectangle Hemstitch dies.
Attached fussy cut Gingham Hat & Scarf (all one piece) to Snowy.
Used Grey Zig marker to add grey tones to Snowy and to ground Snowy.

Then popped up Snowy using craft foam.
Added STAMPlorations "Merry Everything" Clear Stickers sentiment and Done!
I loved the results and hope you do too:-)

You have until the 24th to play along with the CAS Christmas Card Challenge!

Love and hugs..


Supplies:
Stamps: PB Snowy
Paper: SU Basic White 100# CS.  SU  Basic Gray CS
Inks: Versafine Onyx Black.  Zigs Gray
Accessories:  Spellbinders Rectangle Hemstitch Dies.  SU Clear EB Powder,  Paper Snips.  STAMPlorations Clear Stickers "Merry Everything".  Craft Foam.  Connect Glue. 


Adding to NBUS #31 Challenge   

Merry Little Christmas October #39 Anything Christmas Goes

Christmas Crafts All Year Round:

OCTOBER Challenge-Something that starts with S and/or T


I used Snowman for "S"

Peace on Earth Christmas Challenge #1 Always Anything Christmas Goes 


Monday, September 20, 2021

CAS Christmas Card Challenge: Plaid

So happy to be playing in the September CAS Christmas Card Challenge: Plaid
 hosted by Colleen!
I was so inspired by all the DT and GD beautiful card samples:-)

Dolly..you will be proud of me...I even have a Twofer post:-)
A great way to use up scraps from my 1st card!


My 4 1/4 " x 4 1/4"  Plaid  Be Merry Christmas Card

I found this basic red and white plaid Old SU Designer Paper in my stash:-)
I used a new to me NBUS Sizzix Tim Holtz 3D Texture Fades Poinsettia
Embossing Folder on Strathmore MM paper.  I got a beautifully detailed A6 image by 
using the 184# mixed media paper:-)

I cut the image just below the 2 top poinsettia blooms.
Then used the Square Hemstitch Die to frame the flowers.

Used another larger square die from the same set to die cut the plaid paper.
Stamped the sentiment from Penny Black Happy Snippets.
 
Attached layers and popped up onto SU Basic White 100# CS using craft foam and Done!
Almost done...added the SU Dazzle Gold Marker,  then done:-)

I thought I was done,  but kept looking at my leftover Poinsettia and plaid paper
 and the rest of the supplies on my desk. 
 You guessed it...a Twofer was quickly in the making!

Thank you Dolly for reminding us how Twofers can pop out of a messy desk:-)

*****************

A2 Holiday Cheer card to add to my Christmas Card Stash😀

I loved how this Quick Clean and Simple A2 card turned out!
I used ALL the same products as my Be Merry card.  I just created a rectangle 
design card instead of square card.

Enjoy my cards and thank you Colleen for a fun and easy Christmas Challenge.
Love and Hugs, 


Supplies:
Stamps: Penny Black Happy Snippets for the sentiments.
Inks: Archival Jet Black for sentiments.  SU Dazzle Gold Marker.
Paper: SU Basic White 100# CS.  Strathmore 184# Mixed Media Paper.  SU retired Designer Paper.
Accessories: Sizzix Tim Holtz 3-D Texture Fades Poinsettia.  I ordered mine on Amazon Prime. Sizzix Square and Rectangle Dies. Craft Foam.

*************

NBUS #30 Challenge..I used my Sizzix 3-D Texture Fades Poinsettia for the 1st time..Love it!


Tuesday, August 24, 2021

CAS Christmas Card Challenge: Decorations

I am just in time to play in this months CAS Christmas Card Challenge: Decorations!
Thank you Cathy for hosting a fun Challenge.

It has been such a busy month at home harvesting our amazing veggie/berry garden.
I have had to squeeze in all my card making and posting...like today😊

I did get to create 8 backgrounds a few days ago using 3D Embossing Folders on
different colors of SU and Tonic Foil Cardstocks that our very talented Bonnie, Lolly
and friends have been creating. Be sure and click on the links for samples!!!

My card using my beautiful shiny SU Silver Foil Cardstock background.

I Dry Embossed the SU Silver Foil with SU Subtle 3D Embossing Folder and 
then sanded with a sanding block to give the background more shine.
I will be making more cards in the future using the 7 more backgrounds😊

Next die cut the background with Reverse Confetti "Lacy Scallop Frame".
Then stamped with Versamark the STAMPlorations "Warm Hands and Warm Hearts" 
decorated packages image and the sentiment from the set  using MISTI.

Then heat embossed them with Ranger Princess Gold EB Powder,  which I LOVE!
It is a true gold!  Then used CUTplorations "Warm Hands and Warm Hearts" Die to 
die cut the image and popped up with SU regular and Mini Dimensionals.
I fussy cut the sentiment and popped up.

Added the main image to SU Basic White 100# Card Base and Done!
Loved the result and it was truly a QCAS card just in time for the end of the Challenge😃

Now sharing a photo of the beautiful texture and shine!  Enjoy....

Thank you again Cathy for your wonderful challenge.
Love and Hugs...

Supplies:
Stamps: STAMPlorations Warm Hands & Warm Hearts
Paper: SU Basic White 100# CS.  SU Silver Foil CS.
Inks: Versamark Clear.
Accessories: SU 3D Subtle Embossing Folder.  CUTplorations Warm Hands & Warm Hearts.  MISTI. Reverse Confetti Lacy Scallop Frame Confetti Cuts.  Ranger Princess Gold EB Powder. SU dimensionals. Sanding Block.