Saturday, March 23, 2019

CAS Watercolor Card Challenge: Vellum

I rarely use Vellum,  but was inspired to play along with the 
CAS Watercolor Card Challenge:Vellum after seeing all the gorgeous 
vellum cards by the very talented DT and GD.

The challenge ends tomorrow, the 24th at midnight.
I am just under the wire:-) Thank you Jenny for your fun Challenge.


I was inspired by Loll's beautiful Christmas snow card.
Check out her card for her tips and techniques.


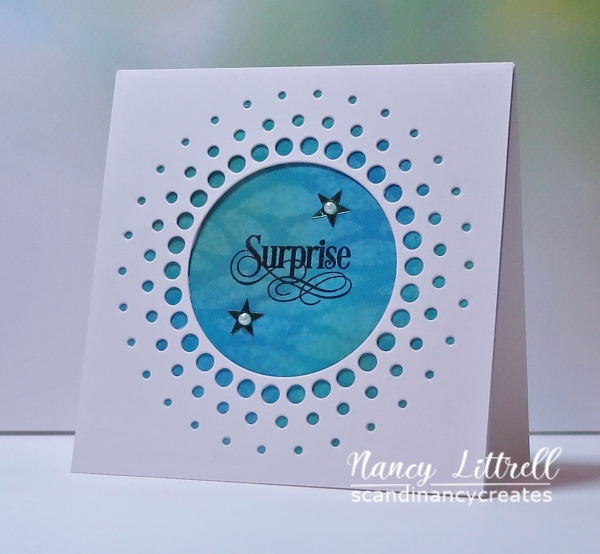
Here is my attempt with a vellum CAS Card.

I also used Brushos.  I used Ultra Marine and Purple Brushos on SU Vellum CS 
and spritzed with water. 

I blotted vellum with paper towel then placed large acrylic block to weight down
and help prevent most of the curling.  I was only planning to use part
of the background, so not concerned with the curling.
Let sit overnight with the block to air dry.

Dry Embossed entire background with SU Decorative Dots EB Folder for my snow.

Die cut vellum background with CUTplorations ATC Tag Builder Die
and attached to SU Pacific Point CS using SU fine tip glue pen.
Weighted down with block until dry.  Dried quickly.

 I die cut the CUTplorations Trendy Christmas Trees
Coordinated Dies with the extra vellum background.
Also die cut trees and ATC out of white craft foam and attached to vellum pieces.

Then used MISTI to ink sentiment with a Zig marker. 
I used STAMPlorations Trendy Christmas Trees sentiment
 and stamped on vellum. Curled vellum under background and attached with tape.

Attached main image to SU Whisper White 100# CS. 
Next attached trees to main image.  Used fine tip glue pen and weighted down.

Done and thankful I had Loll's step by step instructions.
Thank you my friend for always inspiring me....Hugs!

Adding to STAMPlorations Anything Goes 


Supplies:
Stamps: STAMPlorations Trendy Christmas Trees..Sentiment.
Paper: SU Vellum Cardstock, Whisper White 100# CS and Pacific Point CS.
Inks: Brushos: Ultra Marine and Purple.  Zig marker for sentiment.
Accessories: CUTplorations ATC Tag Builder Die and Trendy Christmas Trees Coordinating Dies.
White Craft Foam, SU Decorative EB Folder and Fine Tip Glue Pen. Large Acrylic Block for weight.

Thursday, March 21, 2019

CAS Christmas Card Challenge: Deer

This months CAS Christmas Card Challenge: Deer..is Special!


Loll and Bonnie are celebrating the CAS Christmas Card Challenge's First Birthday!
Gorgeous card samples by the DT and GD, Chrissie and....prizes:-)

$25 gift certificate for Simon Says Stamp for challenge Winner
&
$25 gift certificate for Simon Says Stamp for one random draw of all entries
(must follow the challenge rules to be eligible for prizes)


Here is my Deer Christmas Card.


Susan (Cardmaker's Garret) is hosting this month and is the Queen of Christmas Cards all year round! She sell's her cards at a Christmas sale with the proceeds going to her favorite cause.
You are so generous and kind, my friend.

I die cut my Ali-Express deer and trees winter die cut (a gift from a special friend)
3 times and then stacked using SU Fine Tip Glue Pen.

Found this pretty monoprint stenciled background on Strathmore Mixed Media
in my stash. I thought it was similar to snow falling.
I used Distress Oxide inks,  but do not remember the colors.

I used TCW Corn Cob Etching Stencil for my monoprint background.
Attached to 4 1/4" square SU Whisper White Thick card base.

Thank you Susan for a wonderful challenge.  I loved how my card turned out.
You still have until the 24th to play along. Hugs..


Supplies:
Stamps: Penny Black Holiday Snippets sentiment
Paper: Strathmore Mixed Media.  SU  Whisper White Thick CS
Inks: DOX inks.  Versafine Black in for sentiment.
Accessories: The Crafter's Workshop Corn Cob Etching Stencil.  Ali-Express Deer scene Die. SU Fine Tip Glue Pen.


Monday, March 18, 2019

CAS Stencil Card Challenge March Reminder

The March CAS Stencil Card Challenge hosted by our talented Julia
has been so much fun and inspiring.  So many beautiful cards by our DT and 
Wonderful Guest Designer, Ishani (Quillish)

It is now time for our creative Reminder CAS Cards by our DT and GD.

You still have time to play along until the 18th.

I had so much fun playing that I ended up with a Gift Card Set!


My 1st Card,  Lot's of Love using Distress Oxide Inks.


My 2nd card using different Distress Oxide Inks and different sentiment.


My 3rd card using the same Distress Oxide Inks as my 1st card, but shows what Not to do.
I blended my inks together too much so ghosting did not show,  but still a nice background.

My cards are a 4 1/4" x 4 1/4" format.  I die cut the card fronts with Memory Box
"Large Circle Burst"  Die.

I used Loll's Ghosting Technique Video for my technique.
I sponged my backgrounds with Distress Oxides using TH Mini Blending Tool.
Let dry completely then stamped sentiment using MISTI and heat embossed.

Attached to die cut layer and then to SU Whisper White card base.
I added sequins and tiny pearls for embellishements and Done!

I added DOX colors to my Supply list below. Enjoy.

We would love if you joined us at CAS Stencil Card Challenge: Ghosting.  Hugs..


Supplies:

Card #1: 
Stamps: Penny Black: Happy Snippets
Paper: SU Whisper White Thick card base, Strathmore Mixed Media
Inks: Versafine Black 
Distress Oxides: Squeezed Lemonade, Carved Pumpkin, Abandoned Coral and Picked Raspberry.
Accessories: Memory Box "Large Circle Burst" Die.   SU Clear EB Powder and heat tool. SU sequins and pearls and Fine Tip Glue Pen. TH Mini Blending Tool.

Card #2:
Stamps: SSS "Thoughtful Messages"
Paper:  Same 
Inks: Distress Oxides: Twisted Citron, Lucky Clover, Peacock Feathers and Salty Ocean.
Accessories: Same 

Card #3:
Stamps: Penny Black: "Heartfelt"
Paper: Same
Inks: Same as Card #1
Accessories: Same


Sunday, March 17, 2019

STAMPlorations Stencil Sunday Projects

I am pleased to be joining in STAMPlorations "Stencil Sunday".
Shery is again starting up this fun post using ARTplorations stencils.
Each month there will be stencil projects on the 2nd, 3rd and 4th Sunday.

I am sharing 4 Stencil Bookmark Projects the 3rd Sunday of March!


My STAMPloration Stencils, Stamps and Dies.
Sponged Seedless Preserves Distress Oxide Ink onto 2 1/4" x 6" 
Strathmore 140# Mixed Media Paper.

Placed "Fairy Tale Forest" Stencil over sponged bookmark and secured stencil
with masking tape. Then sponged with Shaded Lilac Distress Oxide ink.

Stamploration Products used for stenciled bookmarks.

*****

My 1st Stenciled Bookmark.

Showing the shine from the heat embossed sentiment and
"Fairy Tale Forest" stenciled image.
Because this is a bookmark, I wanted to protect the ink from smearing
onto book pages by heat embossing.  

*****

My 2nd Stenciled Bookmark

This bookmark background was an unplanned design.
I could not waste all the Shaded Lilac Distress Oxide ink on the stencil
from the 1st bookmark. 
What's a girl to do...make a Monoprint image, of course:-)

It turned out beautifully with the "Fairy Tale Forest" Stencil!
I finished both 2 1/2" x 6" bookmarks with a cardstock frame and ribbon. 

*****
My next 2 bookmark projects.
Sponged bookmarks using Distress Inks instead of Distress Oxide Inks and
used a different design than my 1st two bookmarks.

*****

My 3rd Stenciled Bookmark

I used 2 of the "ATC Tag Builders" Dies to die cut the top and bottom of
my bookmark.  Then stenciled the tag using the "Weaving" Stencil and Mowed Lawn
Distress Ink.  Stamped the sentiment and heat embossed with clear EB powder.

*****

My 4th Stenciled Bookmark using ATC Tag Builder Dies.

I used the new "Bloomdala #4" and "Bloomdala #14" Stencils sponging with Blueprint
Sketch Distress Ink.  Stamped sentiment and heat embossed 2" x 5 3/4" bookmark.

Thank you if you made it all the way down my photo post!

Thank you Shery for encouraging me to finally take photos of my design process.

*****
If you want a chance to win a $15 Gift Certificate to the STAMPlorations store
leave a comment on my blog and/or the Three March Stencil Sundays posts.

My STAMPGIRLNANCY coupon is available for 20% off most orders when checking out.


Friday, March 15, 2019

STAMPlorations March CAS Challenge Extra

Time for the STAMPlorations March Challenges Extra Post.
I am adding my CAS card to the CAS Challenge Anything Goes: But without the color Twist.


I Loved how my "Bloomtangled #1 Cover Plate" card turned out.  Very different from
my Coral and Pink Bloomtangled #1 cards Here.

Be sure and check out the Extra projects for all the challenges.
Gorgeous and Inspiring projects by many of the STAMPgirls.
I am loving this Bloomtangled #1 Cover Plate.  I only have a few cover plates,  but will be getting more as I am finding they are very versatile and fun.

I blended my Distress Oxide inks onto Strathmore Mixed Media using T.H. mini Blending
Tools.  I used  Fossilized Amber, Twisted Citron, Lucky Clover,
Salty Ocean and Faded Jeans Distress Oxides.

Next added SU double stick Adhesive to back of blended background and then die cut with
Bloomtangled #1 Cover Plate Die then adhered to SU Whisper White Thick CS.


Added stamped Think Positive sentiment from "Its a Girls Thing: Kindness" and popped up with fun foam.
Then attached to card front and Done! Loved how it turned out:-)


I would love if you used my personal STAMPGIRLNANCY discount code for
20% off your next order.  Can often combine with STAMPlorations discounts too!


STAMPlorations NEW OUTLET Store is now Open!


Tuesday, March 12, 2019

CAS Mix Up faux stained glass

Happy CAS Mix Up 3rd Birthday, Loll, Bonnie and to your talented DT and GD's:-)
I have learned so many new techniques and creative ways to use Mixed Media.
Thank you so much dear friends.  


Wonderful  Faux Stained Glass Technique hosted by the very talented
mixed media artist: Joanna (Jo-Jo's Spot)
Fabulous inspiring cards by the very talented DT and GD.  There are very helpful videos
at the CAS Mix Up site too.


My 1st attempt at faux stained glass:-)

I started by choosing a pretty blue and green Alcohol Ink on Yupo paper
background from my stash.

I die cut the AI background with Poppystamps Floral Stem Collage Die.
Next die cut Whisper White Thick CS 4 times with same die.
I stacked and glued together 3 of the die cut positive layers of flower and frame
using SU  Fine Tip Glue Pen and weighted down with acrylic block until dry.

  Attached Alcohol ink negative die cut pieces behind stacked flower image
using scotch tape.

Then the fun began....Added 3 layers of Nuvo Crystal Glaze,  air drying between
layers.  Then attached 4th die cut image with glue.
Popped up image with fun foam,  attached to SU 110# Whisper White CS then
stamped, heat embossed and added sentiment and Done!

I would like to try this technique again in the future with smaller images.
Thank you Joanna for inspiring me to try this fun technique.

Hope you get to play in this awesome 3rd Birthday CAS Mix Up Celebration!

Hugs...


Supplies:
Stamps: SSS Messages for Everyday sentiment.
Paper: SU Whisper White Thick CS.  Yupo Paper.
Inks: Alcohol Inks blues and greens.  Versafine black.
Accessories: Poppystamps Floral Stem Collage Die.  SU Fine Tip Glue Pen.  Nuvo Chrystal Glaze. Clear SU EB powder.

Thursday, March 7, 2019

STAMPlorations CAS Card Challenge Anything Goes: optional twist Coral Pink.

Already time for the STAMPlorations CAS Card Challenge AG: optional color twist
Coral Pink.  Beautiful colors to create Spring designs or Anything you desire.

You will love the inspiring CAS Cards by our talented design team.


 Life in Full Color stamp set.

I used TH blending tools to sponge with Distress Oxide inks on A2 (4 1/4" x 5 1/2") 
 Strathmore Mixed Media paper.
DOX Colors used: Cracked Pistachio, Picked Raspberry, Abandoned Coral, 
Wilted Violet and Fossilized Amber.

Then die cut sponged background with Bloomtangled #1 Color Plate.
Removed Color Plate carefully and added scotch tape to the back 
replacing the few pieces that fell out.  The sticky tape secured the pieces.
Attached white cardstock to the back with double stick tape for more security.

Then die cut the one A2 image with the 2nd largest "Crazy Double Running
Stitch Rectangle Nesting Die".  Next die cut the remainder of the A2 image with the
same size die.  So ended up with Two backgrounds for cards:-)

Added a narrow black CS frame and popped up on the die cut card front using fun foam
turning the image vertically.
Stamped and heat embossed the "Life in Full Color" sentiment and Done!


Sharing photo of both die cut images before made into cards.
Now you can see how I turned the image on my 1st card.


My 2nd card using the bottom half of the Cover Plate image.
I used the same STAMPloration Dies and stamp set.
Added a SU Calypso Coral frame and designed a Horizontal Card.

I loved playing with the coral pink colors and gorgeous Bloomtangled #1 Cover Plate.
Enjoy and hope you get to play along with this month at STAMPlortions CAS Challenge..
You have until the last day of the month to join us.  Hugs..


Challenge Rules and Prizes:
  • Players can link up to 3 CAS cards.
  • Players can enter a CAS card with or without the optional color twist.
  • Non-STAMPlorations products are OK
  • To qualify for the prize, players must display challenge graphic and link back to the challenge post (blogs only)
  • Prizes: $15 GC for the winner (voted by the team); $5 GC to three (3) randomly picked players

If you use my discount code STAMPGIRLNANCY when you check out at the 
STAMPlorations Store you can get a 20% discount,  which you can use
with some other discounts too:-)


Monday, March 4, 2019

CAS Stencil Card Challenge: Ghosting.

Hosted by the very talented, Julia (Create With Me)!

We are thrilled to have Ishani (Quillish) as our 1st Guest Designer for our new Challenge.
You will love her beautiful cards along with our talented Design Team's creations.
As always,  there are videos to help you with techniques.


My Ghosting Card

I began by sponging Distress Oxide Inks: Fosilized Amber, Twisted Citron, Lucky Clover, 
Cracked Pistachio, Peacock Feathers, Salty Ocean, and Faded Jeans using
T.H. mini blending tool onto Strathmore Mixed Media. 

I used Loll's Ghosting Technique.  Here is the link to her awesome You Tube Video.
After background completely dried I placed my background on top of an
acrylic block and laid the Diamond Circles Stencil on top.

Spritzed with water and carefully removed stencil and let set a couple of minutes.
Then blotted with paper towel and watched the ghosting magic:-)

Set aside background to dry and then die cut poppy flower a couple of times and
stacked for more thickness.
  The flower and stencil were gifts from a sweet friend:-)

In MISTI stamped sentiment with Versafine and heat embossed with clear eb powder.
Attached flower and popped up the STAMPlorations Carved Flowers sentiment. which helped ground the poppy.

Next embossed the SU Whisper White Thick CS card front with Penny Black 
Antique Frame Die using SU Big Shot Embossing Mats.
My 1st time to try dry embossing with a die technique,  I was happy with the results.

Popped up the main image with fun foam and Done!

You have until the 24th to share your Ghosting Technique CAS Cards.
We love it when you play along.  Hugs..


Supplies:
Stamps: STAMPlorations "Carved Flowers" sentiment.
Paper: SU Whisper White Thick CS.  Strathmore Mixed Media.
Inks: Distress Oxide Inks: Fosilized Amber, Twisted Citron, Lucky Clover, 
Cracked Pistachio, Peacock Feathers, Salty Ocean, and Faded Jeans.  Versafine black pigment ink.
Accessories: SSS Diamond Circles Stencil.  Die Cut poppy (Ali Express). TH mini blending tools and spritzer. SU EB clear powder and Big Shot EB Mats.  PB Antique Frame Die.  Fun Foam.