Here is the link from Shery's STAMPlorations Blog of 24 samples of my STAMPlorations
Fall and Winter Paper Goods Pack cards. I was able to create 22 Christmas Cards and
12 Fall All Occasion cards from the Paper Goods set with products left over😊
I think you will be impressed with the versatility of Shery's Paper Good Pack...
I sure was and in no time I added to my Christmas and All Occasion Cards stashes!
The Pack is 1/2 price and you can add any or all of the wonderful sentiment die cut sets
to your order at an extra cost. I had fun adding die cut sentiments to all my cards,
which I popped up with die cut layers!
Enjoy some of my favorite cards and short descriptions!
*************************************
Fall Cards!
57th Anniversary Fall card for Denny using Paper Goods Pack and Everyday
Sentiments Phrase Dies set💕
Fall Birthday Card using Paper Goods Pack and Everyday Sentiments Phrase Dies set.
Thanksgiving Card using Paper Goods card front and ephemera. I die cut the 3 x 4
cardstock layer and added the ephemera, which I enhanced with Chrystal Glaze and
then added the die cut Phrase sentiment. Photo was taken before adding Glaze.
Paper Goods 3" x 4" Journaling card and Skinny Sentiments Phrase Dies.
Paper Goods A2 cardfront and Skinny Sentiments Phrase Dies!
Now onto Paper Goods Pack Christmas Cards💕with examples of added sparkle!
Paper Goods 3"x4" Journaling Christmas card with LOTS of glitter!
Connect Glue with Dazzling Diamonds glitter on snow and silver
Glitter Paper die cut Noel using Christmas Sentiments Phrase Dies.
Paper Goods 3"x4" Journaling Christmas card using Connect Glue with
Dazzling Diamonds glitter on snow and die cut silver Glitter Paper
Joyful using Christmas Sentiments Phrase Dies and then cut off "ful".
Paper Goods A2 Card Front with images covered with Wink of Stella.
Very glittering in real life💕 Die cut Joyful and painted with metallic watercolors.
Outlined all the images with 03 art pen, which made the images pop!
Then die cut the Joyful and painted with gold metallic paint!
Embellished Paper Goods A2 Christmas cardfront with Connect
glue and added DD Glitter to the center of snowflakes and die cut Merry sentiment
from silver glitter paper. Pretty, sparkly and touchable😊
Moving onto Ephemera Christmas Card Samples💖
I die cut layers to frame the sugary sweet Christmas Ephemera image and added the
die cut Joy from the Christmas Sentiments Phrase Dies set!
More die cut framing for the Ephemera and die cut Joyful😊
A sweet Holiday scene framed Ephemera with the added die cut Joy.
Wow...we can now be Joyful!!! Hope you enjoyed ALL the creative and fun
ways to use STAMPlorations Fall and Winter Paper Goods Pack and
wonderful die cut sentiment sets.
Goods Pack with the extra Sentiment Sets that you can add to your order for
an additional cost.
********************************
The CUTplorations Die Sets
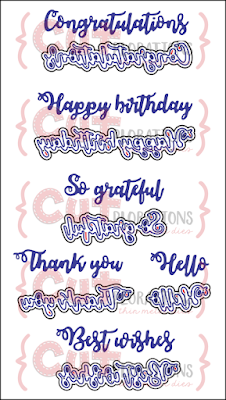
Everyday Sentiments Phrase Dies
Christmas Sentiments Dies
Thank you for your visit and patience if you made it to the end of my
photo heavy post, my dear friends.
Wishing you all a special and Happy Holiday Season💕
Love and Hugs,


.JPG)

.png)


%20Gesso%20Challenge.png)
%20Sept%202022%20Gesso%20Smile%20(1).png)
%20Gesso%20Challenge.png)
%20Sept%202022%20Gesso%20Thanks.png)