Wednesday, May 19, 2021

STAMPlorations 2021 Spring Fling Hop & Linky Party

STAMPlorations May 19th 2021 Spring Fling Hop & Linky Party has begun😀
Click on the link above for all the details.

You will be Awed by all the Awesome projects the STAMPGirls have made using the New STAMPlorations Quick Card Fronts and Die Cut Words or Phrases.

Here is my finished card using
CUTplorations Word Phrase Big Hugs


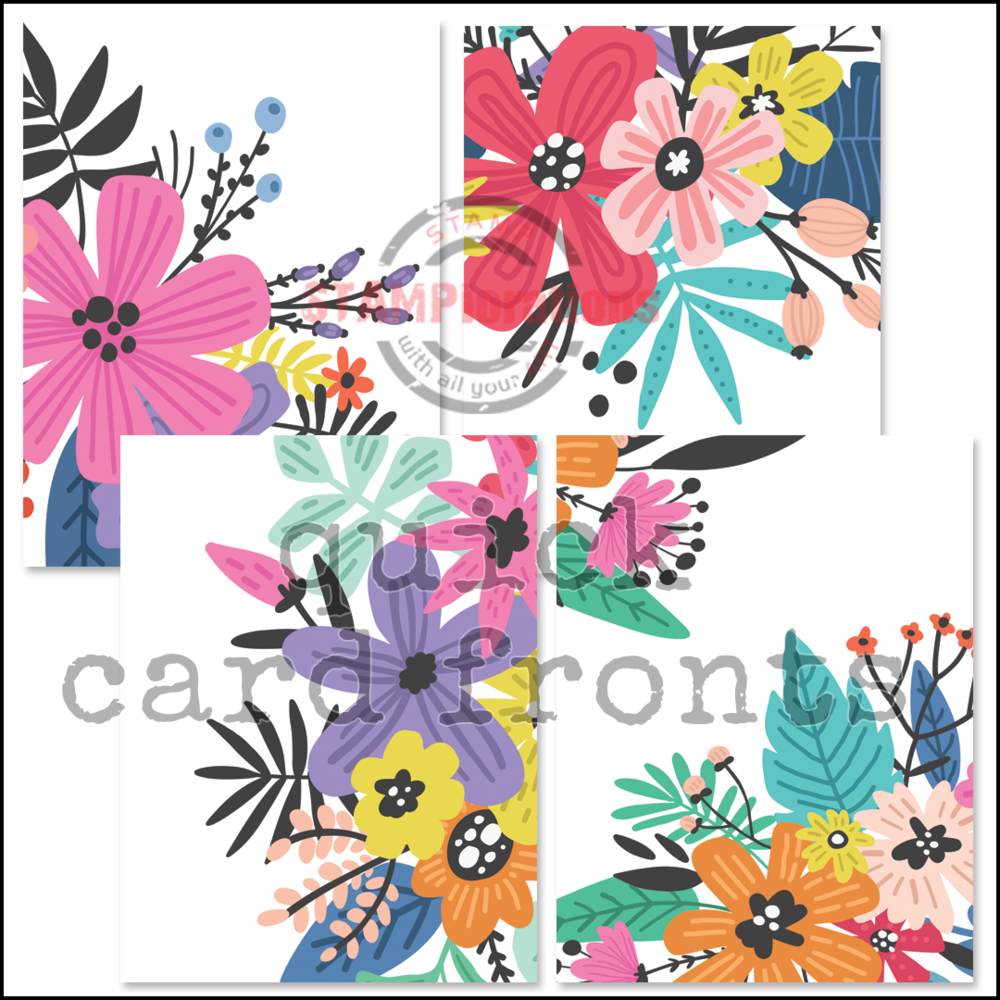
Photo was taken before layering the die cut and outlined layer on the card on the right  over the original layer.
There are 4 different designs and total of 8 card fronts in each Quick Card Front set.


 Artsy Florals A2 Card Fronts before enhancing the images by outlining with a black art pen and die cutting word phrase Big Hugs 4 times and stacking.

Then die cut the Crazy Double Running Stitch Rectangle Dies frame,  popped up with craft foam and layered the card front over the same 2nd card front and outlined the image that extended beyond the top Quick Card Front layer.  

So much fun adding the creative outlining, die cut stacked sentiment and frame to the beautiful Artsy Florals A2 Card front.  Be sure and check out all the STAMPgirls awesome projects too.

We would love to have you play along with our 2021 Spring Fling Hop & Linky Party. 

STAMPlorations Products...


Word Phrase Big Hugs


Until June 7, products found in the Spring Fling section of our store are 45% off with the code SPRINGFLING45

Code can be used once per customer/shipping address.
And now for the Spring Fling Linky Party rules:
  • Create any type of project (card, tag, ATC, layout, art journal page, etc.) with a SPRING theme -- anything with flowers, birds, butterflies, and anything associated with spring.
  • A note: We prefer to see projects made specifically for entering in challenges (not just this linky) over projects that are promotional in nature. 
  • You may link up a maximum of FIVE (5) projects to qualify for the prizes. Each entry must be in a separate blog post.
  • To qualify for the prizes, you must have a text link that links back to this post AND you must display our event graphic below in your blog post(s). If you are linking from your Instagram account, you must tag @stamplorations AND use the hashtag #springflinglinkyparty2021.
  • Use any product(s) you have to create your spring-themed projects; STAMPlorations products are not required although if you use STAMPlorations products in your entries and you're randomly picked as a winner, you get a bonus prize.
  • Link up by Monday, June 7, 11:55 p.m. Pacific.
There are prizes too!
blog hop prizes:
- 3 winners of a $7 prize code randomly drawn from comments left on the STAMPlorations blog and designers' blogs
linky prizes:
- 2 winners of a $12 prize code
- 1 winner of a $25 prize code
extra prizes:
- a few surprise winners randomly drawn from our social media accounts (FB, IG, Pinterest, blogs) to win either prize codes or products
hop and linky are open until June 7. winners announced on June 10 in the May winners post.


Saturday, May 15, 2021

CAS Mix Up May Stencil Rainbow Ink Blending Reminder

Challenge hosted by our very talented Susan.
Be sure and check out the beautiful Rainbow colored CAS cards by our talented Design Team and Guest Designer.  You will definitely be inspired!


Using Stencil, Distress Oxide Inks, i-Crafters i-Brushes and Die Cuts.

Die Cut SU Whisper White 100# cardstock with Memory Box Stitched Circle Die then attached my ARTplorations Bloomdala Bliss #5 Stencil over circle using 3M masking tape.  Then the fun began.  

Used Seven of my Ten i-Crafter i-Blending Brushes to blend the Distress Oxide inks.  I Love how the finger dauber brushes are colored so I know immediately,  which brush to use for the different color families.

I started with Candied Apple and went in this order carefully blending the DOX's around the circle image.  DOX: Candied Apple, Spiced marmalade, Squeezed Lemonade, Peacock Feathers, Mermaid Lagoon, Wilted Violet and Worn Lipstick.

Removed the stencil and LOVED the results😊

Next Die cut a larger stitched circle using SU Tangerine Tango cardstock and glued rainbow image onto colored cardstock.  
Placed SU 100# card base in MISTI and stamped the STAMPlorations Life in Full Color stamp set sentiment using Archival Jet Black ink.

Popped up circle image with craft foam and attached to card base and Done!
I was very pleased with the CAS design and colorful stenciled Rainbow colors.

Hope you get to join us this month at CAS Mix Up Stencil Rainbow Blending.
Thank you Susan for a fun and colorful challenge.
This was my 1st try at stencil rainbow coloring and I loved how both my cards turned out.  I will be using the technique in the future I am sure😀

Love and Hugs....


Supplies:
Stamps: ARTplorations Life in Full Color.
Paper: SU Whisper White 100# and Tangerine Tango CS.
Inks: Distress Oxide Inks: Candied Apple, Spiced marmalade, Squeezed Lemonade, Peacock Feathers, Mermaid Lagoon, Wilted Violet and Worn Lipstick.  Archival Jet Black Ink.
Accessories: ARTplorations Bloomdala Bliss #5 Stencil.  Memory Box Stitched Circle Dies.  3M masking tape, Gina K Connect Glue. White Craft Foam. MISTI.


STAMPlorations May Extra Stencil Challenge

STAMPlorations May Extra Stencil Challenge has begun with fabulous projects by our Design Team'  We would love to have you play along. You have until the end of April to play and comment.


Clear Stickers Spring Magic

I positioned the ARTplorations Peeking Dahlias Stencil over Strathmore Mixed Media paper and secured with 3M Masking Tape.  Then used a sponge dauber to apply Clear Versamark thru the stencil on just the top flower.  Carefully removed card front from masked stencil.

Sprinkled center of flower with a combination of Distress Embossing Glaze Antique Linen and Vintage Photo for a light brown color.  Then removed excess Embossing Glaze powder onto copy paper and carefully poured excess powder back into tiny jar to use another time.   Then heat embossed the brown Glaze.  Used the same technique for each color of Distress Embossing Glaze: Rusty Hinge,  Fired Brick and Fossilized Amber.

Replaced card front under masking tape and added Clear Versamark to bottom flower.  Removed card front and repeated the same steps and heat embossing techniques.  Loved the shiny beautiful colors on both Dahlia blooms.

Die cut the frame with the largest A2 Crazy Double Running Stitch Rectangle Nesting Die.
Attached to SU Basic White 100# card base.  Then added the Clear Stickers Spring Magic sentiment and Done!  

My card will be going to my dear 92 year old girlfriend,  Daisy!
She has always been an avid gardener and loves ALL Flowers.

Enjoy our Spring weather and getting outside to play in the dirt!  Love and Hugs..
***************************


******************************


The Rules:
  • Players can link up a maximum of 3 projects -- any type of project is welcome as long as a stencil is used -- but each project must be in its own blog post.
  • Use of stencil (any brand) is a requirement.
  • Non-STAMPlorations products are OK 
  • No sneak peek project entries; full project photo must be displayed on blog post in order to qualify for the prizes.
  • To qualify for the prize, players must display challenge graphic and have a text link to the challenge post (blogs only)

Prizes: $20 prize code to winner / $7 prize code to 3 randomly picked entries

*******************

Use my STAMPGIRLNANCY 20% off Code

Wednesday, May 12, 2021

Christmas in the Air Featuring CITA Kit #1 Again!

Monika and I are continuing to rotate hosting the Christmas in the Air (CITA) Featuring Stamplorations
Christmas in the Air Kit #1.  It is never too soon to start your Christmas stash😊
Shery is introducing my May 12th CITA Feature on STAMPlorations on her store blog.


 Using one of the 18 Gorgeous ATC images from the Kit #1  for my card.  I added black splatters and Clear Stickers, "Merry Everything" from the kit.  Popped up the ATC onto die cut red cardstock and then attached to white card base.

The second card using "Christmas ATC" from kit, which I added black splatters and "Merry Everything" Clear Sticker.  Popped up on die cut red cardstock and attached to white card base.


The third card using "Christmas ATC" from kit, which I added black splatters and "Merry Everything" Clear Sticker.  Popped up over angled die cut blue cardstock and attached to white card base.


Fourth card using "Christmas ATC" from kit and added white splatters, "Merry Everything" Clear Sticker.  Popped up over angled die cut blue cardstock and attached to white card base.


Are you ready for a totally different Christmas Card from the same very creative Christmas in the Air Kit #1
***************************

I used the "Holiday Trees Stencil" and stenciled the upper part of the white card base using Distress Inks and blended with i-Crafter i-Brushes.  Used Zig markers to color the stars and tree trunks.
Then removed the stencil.  Loved the Christmas trees:-)

Next added Wink of Stella to the cute deer's nose, antlers, scarf and hooves:-)
Added Washi Tape from my stash to ground the "Christmas Ephemera #1" cute deer from the Kit,  then popped up the deer with craft foam and stamped the sentiment from the" Christmas Joy" clear stamp set.  Attached black cardstock over white 100# cardstock card base to make the card front pop!  Then Done!  A fun and cute kids card:-)


Now to share the "Christmas Coffee Cups" Colorables?  They make Beautiful Christmas Tags!

The 1st two coffee mugs I spread a thin layer of Watercolor Ground (or you can use clear Gesso) and let dry,  which prepared the 120# cardstock for my wet on wet watercoloring.  I used Kuretaki Gansai watercolors and when dry stamped with "Christmas Joy" stamp set sentiments.  So fun and relaxing to paint the Colorables.


My next two Colorables Coffee Mugs are very different from each other.  The darker coffee mug I watercolored with Zigs and then heat embossed the entire mug with clear embossing powder. Then stamped and fussy cut the Joy from the "Christmas Joy" stamp set and attached to mug.  I colored the light colored mug with Prisma Pencils (no watercoloring) and  added a trimmed "Merry Everything" Clear Sticker.  


Wow..5 creative Christmas cards and 4 Coffee Mug tags to add to my stash and I still have more than enough products leftover to create another Christmas in the Air Feature in July:-)  Thank you for visiting my blog and would love to see you join me again in July for more Kit #1 inspiration😊


Note: Photo shows only 9 of the 18 Ephemera ATC Cards!


VieQuick w


QuView


Saturday, May 1, 2021

CAS Mix Up Stencil Rainbow Ink Blending

Time for the May CAS Mix Up (S) Rainbow Ink Blending Challenge hosted by our very talented Susan (Cat's Ink Corporated).  We have very colorful CAS cards by our DT and our Guest Designer.  Be sure and check out all their cards and the videos for gorgeous Rainbow Ink Blending Inspiration.


I used a Stencil, Distress Oxide Inks, Die cuts and Stamping.
 
I began by placing SU Whisper White 100# Cardstock on my glass mat and covering with ARTplorations Bold Florals Stencil and securing the stencil with 3M Masking Tape.

Used makeup brushes to blend my Distress Oxide Inks: Candied Apple, Spiced Marmalade, Squeezed Lemonade, Peacock Feathers, Mermaid Lagoon and Wilted Violet on the blossoms. Used DOX Rustic Wilderness and Peacock Feathers for the leaves.  Whew..lots of rainbow colors😀

Removed stencil and used Memory Box "Stitched Rectangle" Die to cut the main image.  Then used MISTI to stamp the SSS "Bouquet of Thanks" sentiment with Archival Jet Black ink.

Popped up the image with craft foam and attached to 100# cardbase and then decided to die cut the border using the leftover image with the next larger size of the stitched rectangle and slipped it over the popped up image.  Loved the results. Now my card was Done!

Hope you like my colorful CAS card and will join us for this fun challenge.  Thank you so much Jenny for your Rainbow Challenge.

You have until the 24th to play along.  We would Love to see your rainbow colored CAS cards. 

Love and Hugs...


Supplies:

Stamps: SSS Bouquet of Thanks sentiment.

Paper: SU Whisper White 100#

Inks: Distress Oxide Inks: Candied Apple, Spiced Marmalade, Squeezed Lemonade, Peacock Feathers, Mermaid Lagoon and Wilted Violet on the blossoms. Used DOX Rustic Wilderness and Peacock Feathers.  Archival  Jet Black.

Accessories: ARTplorations "Bold Florals" Stencil.  Make Up Brushes. 3M Masking Tape.  Memory Box "Stitched Rectangles Dies".  Craft Foam. Gina K Connect Glue. MISTI.


STAMPlorations May Stencil Challenge

Time for our STAMPlorations May Stencil Anything Goes Challenge.  I was inspired by the beautiful Springtime season😎  Hope you join us and check out the inspiring Stencil projects by our Design Team.


ARTplorations Bloomdalascopic 5 stencil
STAMPlorations Mixed Media Elements
Clear Stickers Hello Spring

I began by die cutting the front of my SU Basic White 100# card base with the  CUTplorations Circles All Over Texture Cover Plate.  Next secured ARTplorations Bloomdalascopic 5 Stencil over white 100# cardstock using 3M Masking Tape.

Then I used i-Crafter i-Brush to blend the Distress Oxide Inks thru the stencils.
Used DOX inks: Squeezed Lemonade, Wild Honey, Wilted Violet, Shaded Lilac, Seedless Preserve and Worn Lipstick.  The DOX inks have a more muted tone than Distress Inks.

Placed image layer in MISTI and stamped Mixed Media Elements images using Archival Jet Black ink.
Then removed and die cut the stenciled and stamped image with a stitched circle die.
Popped up with craft foam and attached to card base.

Added  Clear Stickers Hello Spring sentiment to piece of white paper,  trimmed and attached to cardbase and Done!  Fun using 6 stamps from the Mixed Media Elements stamp set for the 1st time😊

We would love to have you join us at STAMPlorations Stencil Challenge.
Love and Hugs,


My STAMPlorations Products


The Rules:
  • Players can link up a maximum of 3 projects -- any type of project is welcome as long as a stencil is used -- but each project must be in its own blog post.
  • Use of stencil (any brand) is a requirement.
  • Non-STAMPlorations products are OK 
  • No sneak peek project entries; full project photo must be displayed on blog post in order to qualify for the prizes.
  • To qualify for the prize, players must display challenge graphic and have a text link to the challenge post (blogs only)

Prizes: $20 prize code to winner / $7 prize code to 3 randomly picked entries


Use my STAMPGIRLNANCY 20% off Code


Adding to NBUS Challenge #26 I used STAMPlorations Mixed Media Elements for the 1st time😊